1. Copy the License Key from the email
2. Paste it into the Registration Dialog
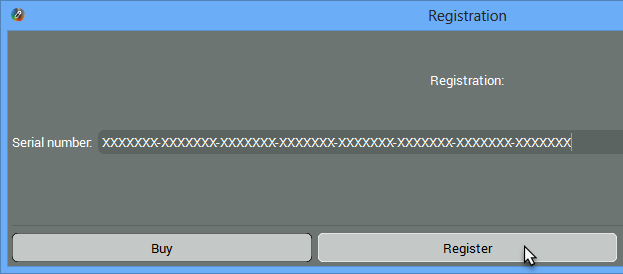
3. Click Register.
4. Close & reopen CODIJY
5. Perform several actions – draw a couple of strokes or click Image Processing.
NOTE: AFTER YOU COMPLETE THE ABOVE STEPS, it may take a couple of seconds for CODIJY to begin running in the registered mode. When it happens, you will see that the watermarks are gone from the result preview.
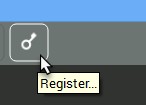
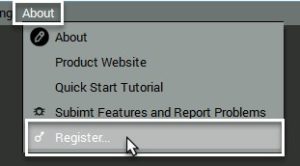
During the trial period, CODIJY does not ask you to enter your license key. To register your copy, please open the registration dialog using the following methods:
- Click the Register button:
- Go to About – > Register
Please read about all options of accessing the registration dialog in CODIJY.
There are a couple of reasons why your attempts to register CODIJY may fail:
MISTYPES: 99% all failed registration attempts are caused by mistypes. CODIJY keys are long and may contain lookalike symbols like “1″ and “I”, Zeros and “O”. If you received your your serial number by emails we strongly recommend using Copy & Paste command.
If you purchased the boxed version of CODIJY with printed License Key, make sure all symbols are correct. If the registration fails, please send us the whole or the part of the key as you see it and we will do our best to locate and email you the correct Key.
Other potential reasons causing failed registration may include:
Reason #1: WRONG EDITION: Make sure you have downloaded installed the right edition of CODIJY. there are exist two editions Colorizer Pro and Recoloring.
Reason #2: WRONG KEY: Make sure you are not copying any other number in your Purchasing Email. CODIJY License Key has 56 symbols excluding dashes the following format:

Reason # 3: OLD KEYS: If you have purchased CODIJY before August 2015, please contact us and we will update your key.
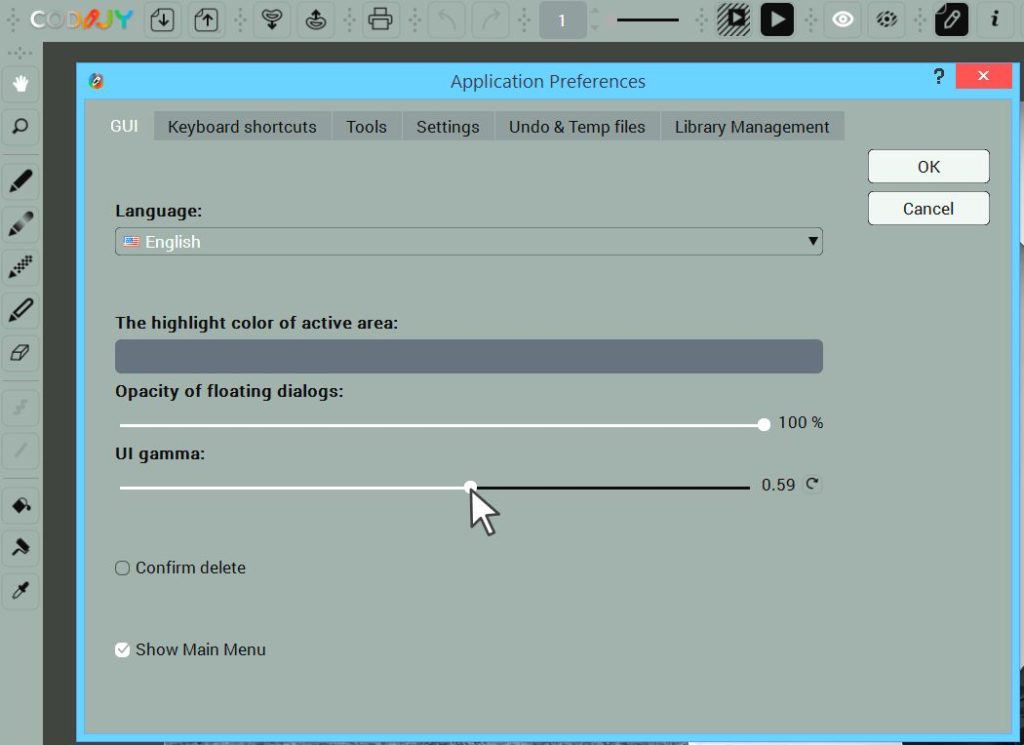
To enable the Top Menu, please
1. Open Preferences: click ![]() or press
or press
Ctrl+K (Win) /Cmd + K (Mac)
2. Tick Enable Main Menu at the bottom of the dialog
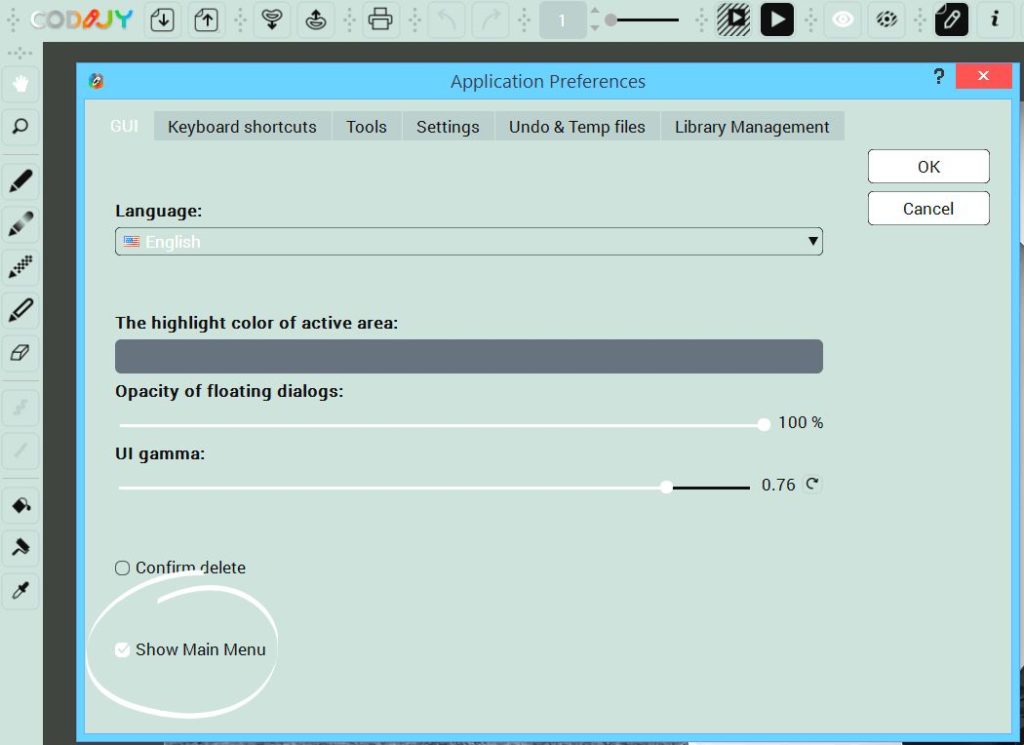
3. Click OK.
Enable Hi DPI Scaling, to make CODIJY look good good on your 4k screen:
1. Open Preferences: click ![]() or press
or press
Ctrl+K (Win) /Cmd + K (Mac)
2. Tick the HiDPI Support checkbox at the bottom of the dialog:
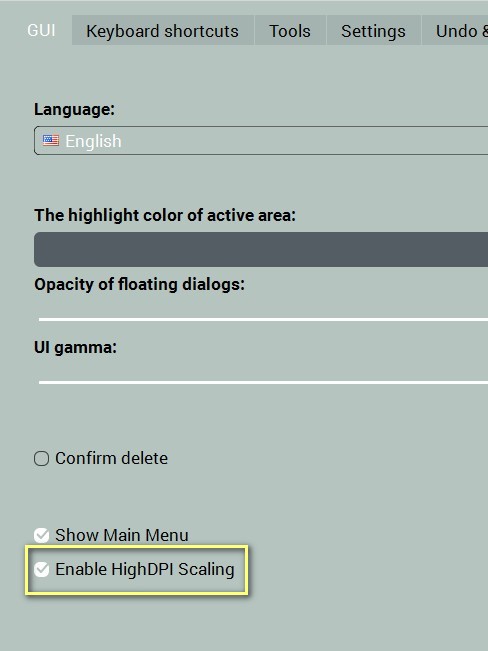
3. Click OK.
CODIJY has the set of layouts to fit all critical tools into screens of small and large sizes. You can change interface layout in the program’s Preferences:
1. Open Preferences: click ![]() or press Ctrl+K (Win) /Cmd + K (Mac)
or press Ctrl+K (Win) /Cmd + K (Mac)
2. Open the Tools Tab:
3. Select a new layout
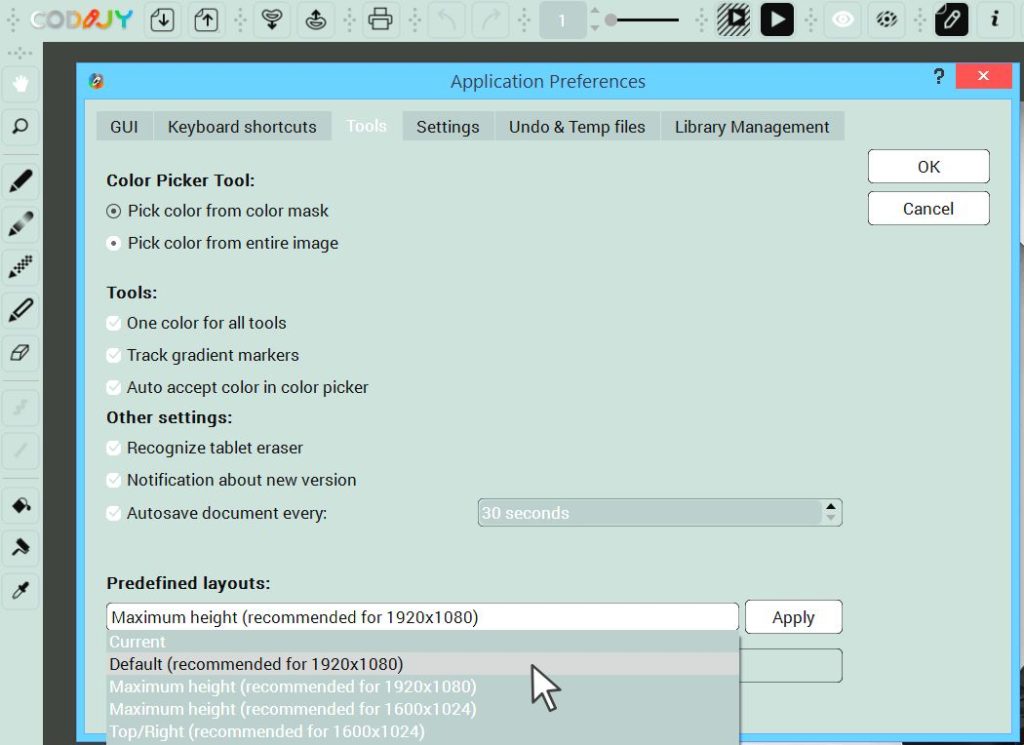
3. Click Apply and OK.
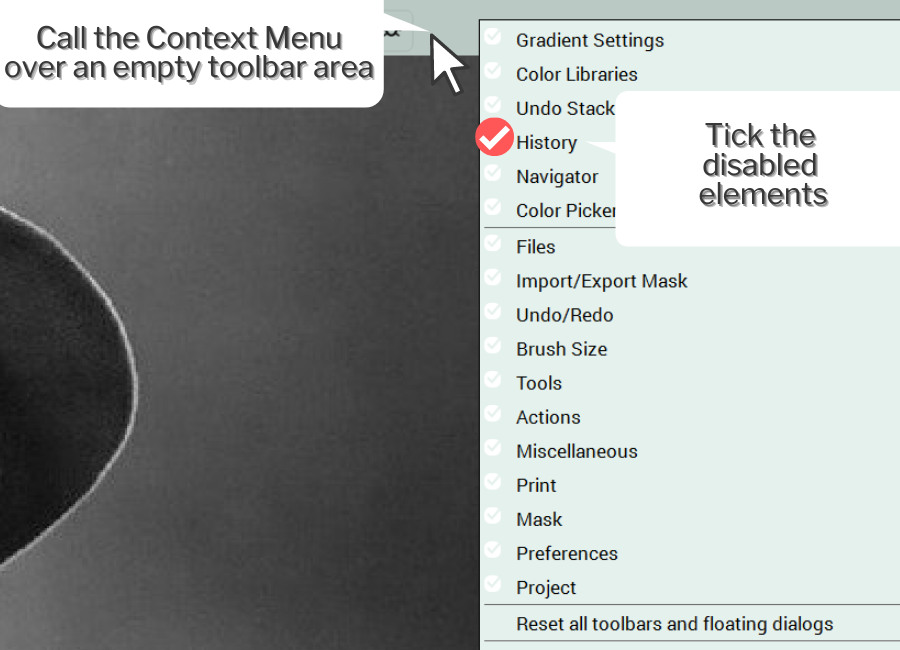
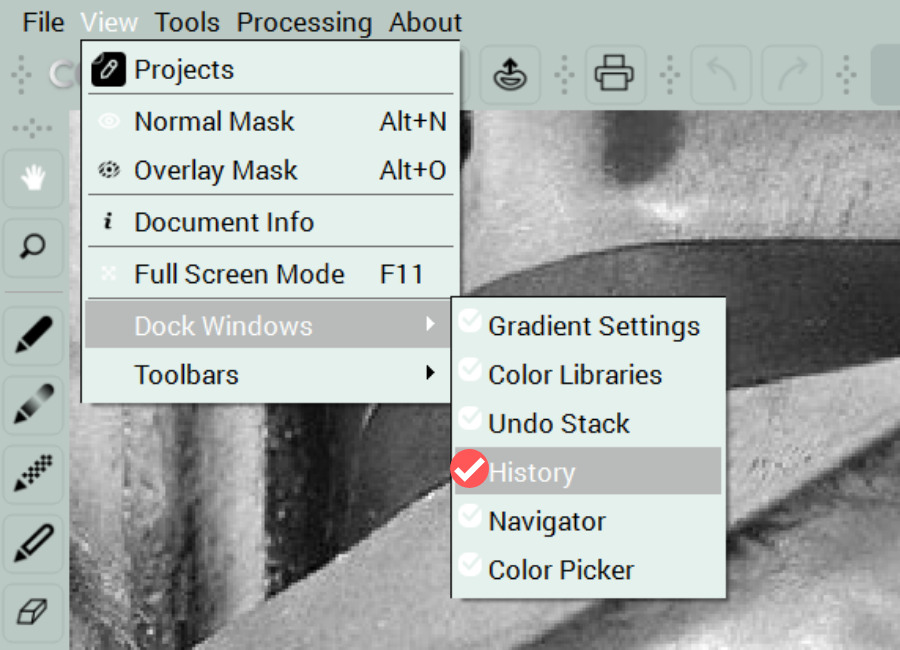
You may have occasionally closed it. There are two options to switch the missing element on:
Option #1 – CONTEXT MENU: Open the context menu by right-clicking the empty toolbar area end tick the missing toolbar:
Option #2 – View Menu:
.
1. Open Preferences: click ![]() or press
or press
Ctrl+K (Win) /Cmd + K (Mac)
2. Adjust interface brightness:
3. Click Apply and OK.
When you make the Result Pane active in the Split view the toolbar with drawing and repainting tools will get deactivated.
Click over the Editor pane to activate them.
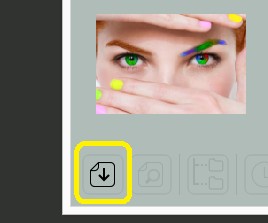
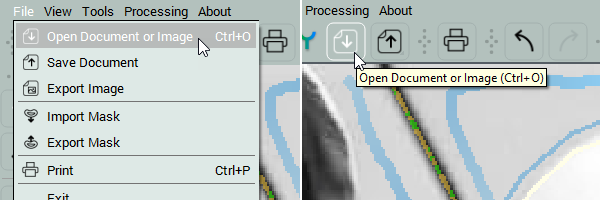
You can open a file in CODIJY software in three ways
Option #1. Click an Open icon in the bottom left corner of the Project Explorer
Option #2 Click the Open Icon on toolbar
Option #3 From the File menu
Step 1. Generate color preview ![]() .
.
Step 2.
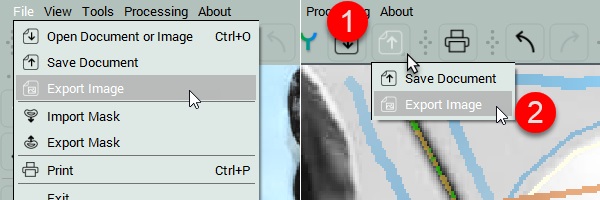
Option #1 Navigate to File -> Export to image
Option #2 Click and hold the Save Document icon. Wait a second before the menu with the command drops down.
We recommend that you save your work to the CODIJY document. The CODIJY files (MGD) save the image along with masks and history of colors for anytime reference!
To edit your colorized image in any other software, export the color preview to the PNG or any other image format supported by the software you are going to work with.
We are not adding the color opacity control options, as you can achieve same results by adjusting Hues, Saturation and Brightness. Many of our users who asked for this function finally found the HSB Repaint tool as useful for this purpose.
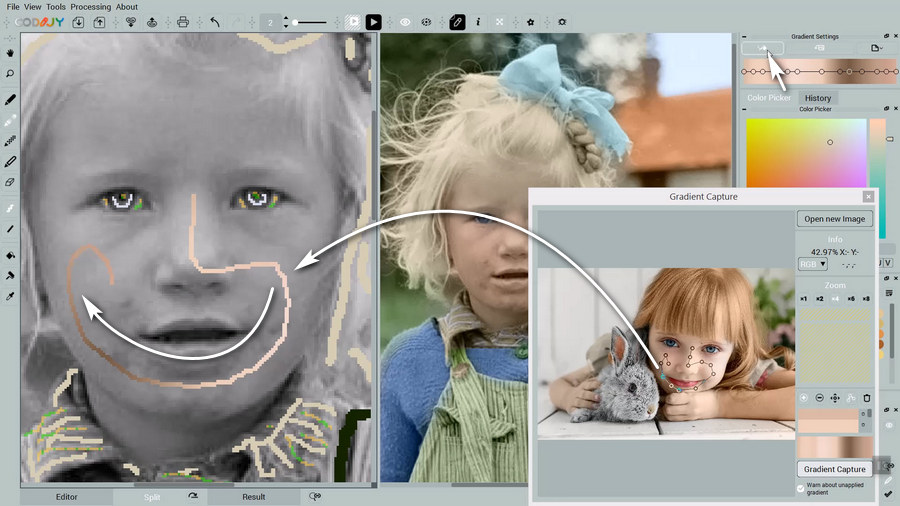
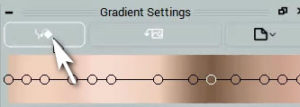
After you have drawn a gradient stroke, you still have the option to fill it with another, best-matching gradient template. Once you are satisfied with result, apply your last chosen gradient with the click of the button in Gradient Settings or press “B”.
Draw the mask close to the area boundary to make sure the program recognizes its location correctly.
You can read the detailed description about the mask drawing process in the How to Draw Color Masks guide.
You can protect areas by drawing a protection mask. we recommend covering the area completely with the brush of the large size.
Just outline the areas with the Decolor pen ![]()
The mask will have the following pattern ![]()
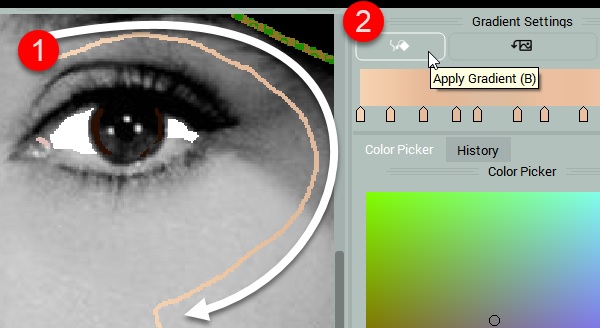
Step 1. Draw gradient following the same rout you have captured it or you wish the gradient colors to apply to.
Step 2. Then click Apply Gradient in Gradient Settings or press B
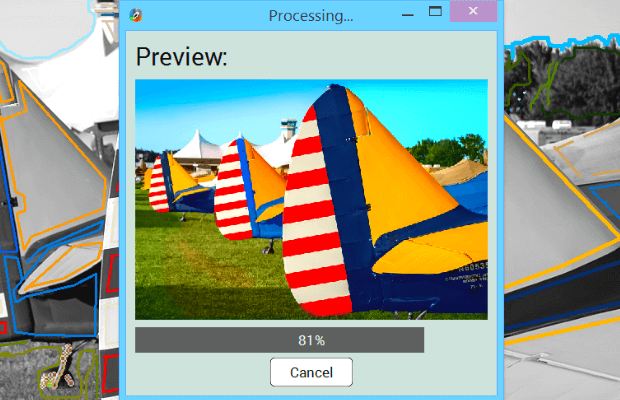
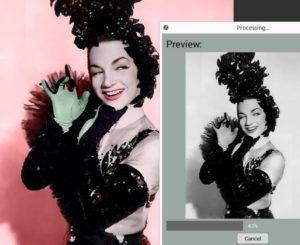
Click Image Processing ![]() or press Ctrl+R
or press Ctrl+R
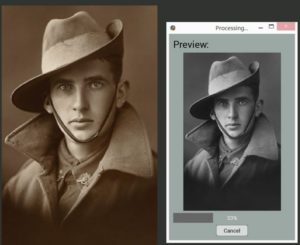
The program will start generating the result
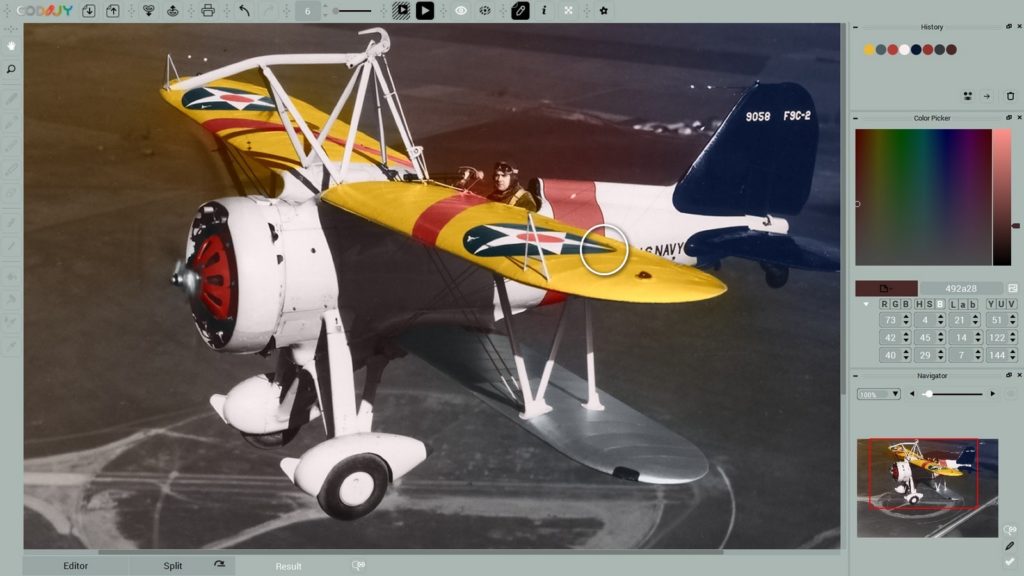
CODIJY products are pretty accurate about treating boundaries in case you draw the mask on the both sides of the boundary and the border is clear.
At times the colors may spill across the boundary at the areas where the algorithms are unable to recognize it. As you can see in the screenshot there is a spilling of the yellow color on the wing (marked with the circle). The colors from the plane spread out over the background land as we have not yet added masks to these areas.
SOLUTION: Add the strokes closer to the border.
CODIJY converts all images to grayscale before colorization automatically. It does not mix new and original colors. instead programs algorithms work with the grayscale image to apply new colors.
1. The image is too large.
Option # 1 Colorizer Pro users have the option to use a small-size version of the image to add masks. After that you can export the mask and import it into file with the full-size original photo. The masks will adjust their size automatically.
Option # 2. Use partial image processing to generate the color preview for the small area you are working upon.
2. Your computer lacks RAM
 yt
yt
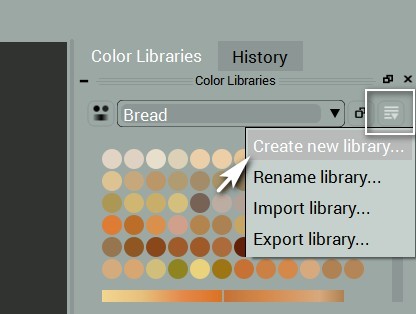
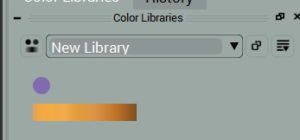
1. Open the Library Actions menu and select “Create new library”
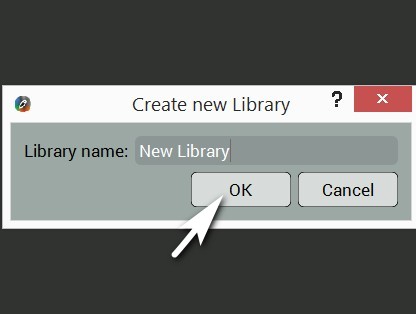
2. Enter the library name and Click OK
Now check the list of libraries.
To delete a new library:
1. Open Preferences: click ![]() or press Ctrl+K (Win) /Cmd + K (Mac)
or press Ctrl+K (Win) /Cmd + K (Mac)
2. Navigate to Libraries
3. Select a library

4. Click Delete and then OK
You can add colors & gradients to your custom libraries.
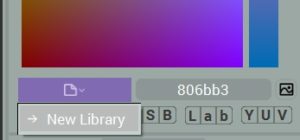
TO ADD A COLOR:
1. Select a color
2. Click its Preview in Color Picker
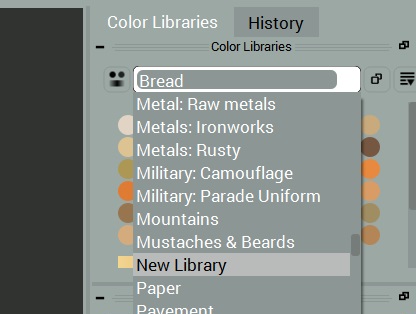
3. Select or create a custom library from the drop down list:
TO ADD A GRADIENT:
1. Click the Add Gradient Button
2. Select or create a custom library.
3. Click the destination library from the drop down list or create a new library.
The new color has been added to the destination library.
1. Navigate to the History
2. Click the Export To Library Button
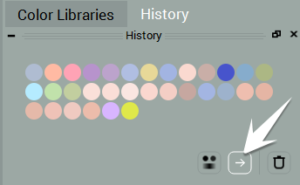
3. Name the New Library and click OK