Colorization Master Class #1

Carmen Miranda

Welcome to CODIJY’s first photo colorization master class!

In this 4-part lesson, you’ll practice adding color to an iconic Carmen Miranda photo. Note that you will need:

CODIJY Colorizer Pro / CODIJY Recoloring

Take this class with any version of CODIJY

Up to 2 hours to complete all steps

This class goes into detail of each step

Download the CODIJY File with Photo + Palette

Carmen Miranda: Colorizing a Portrait

Get Ready for Coloring
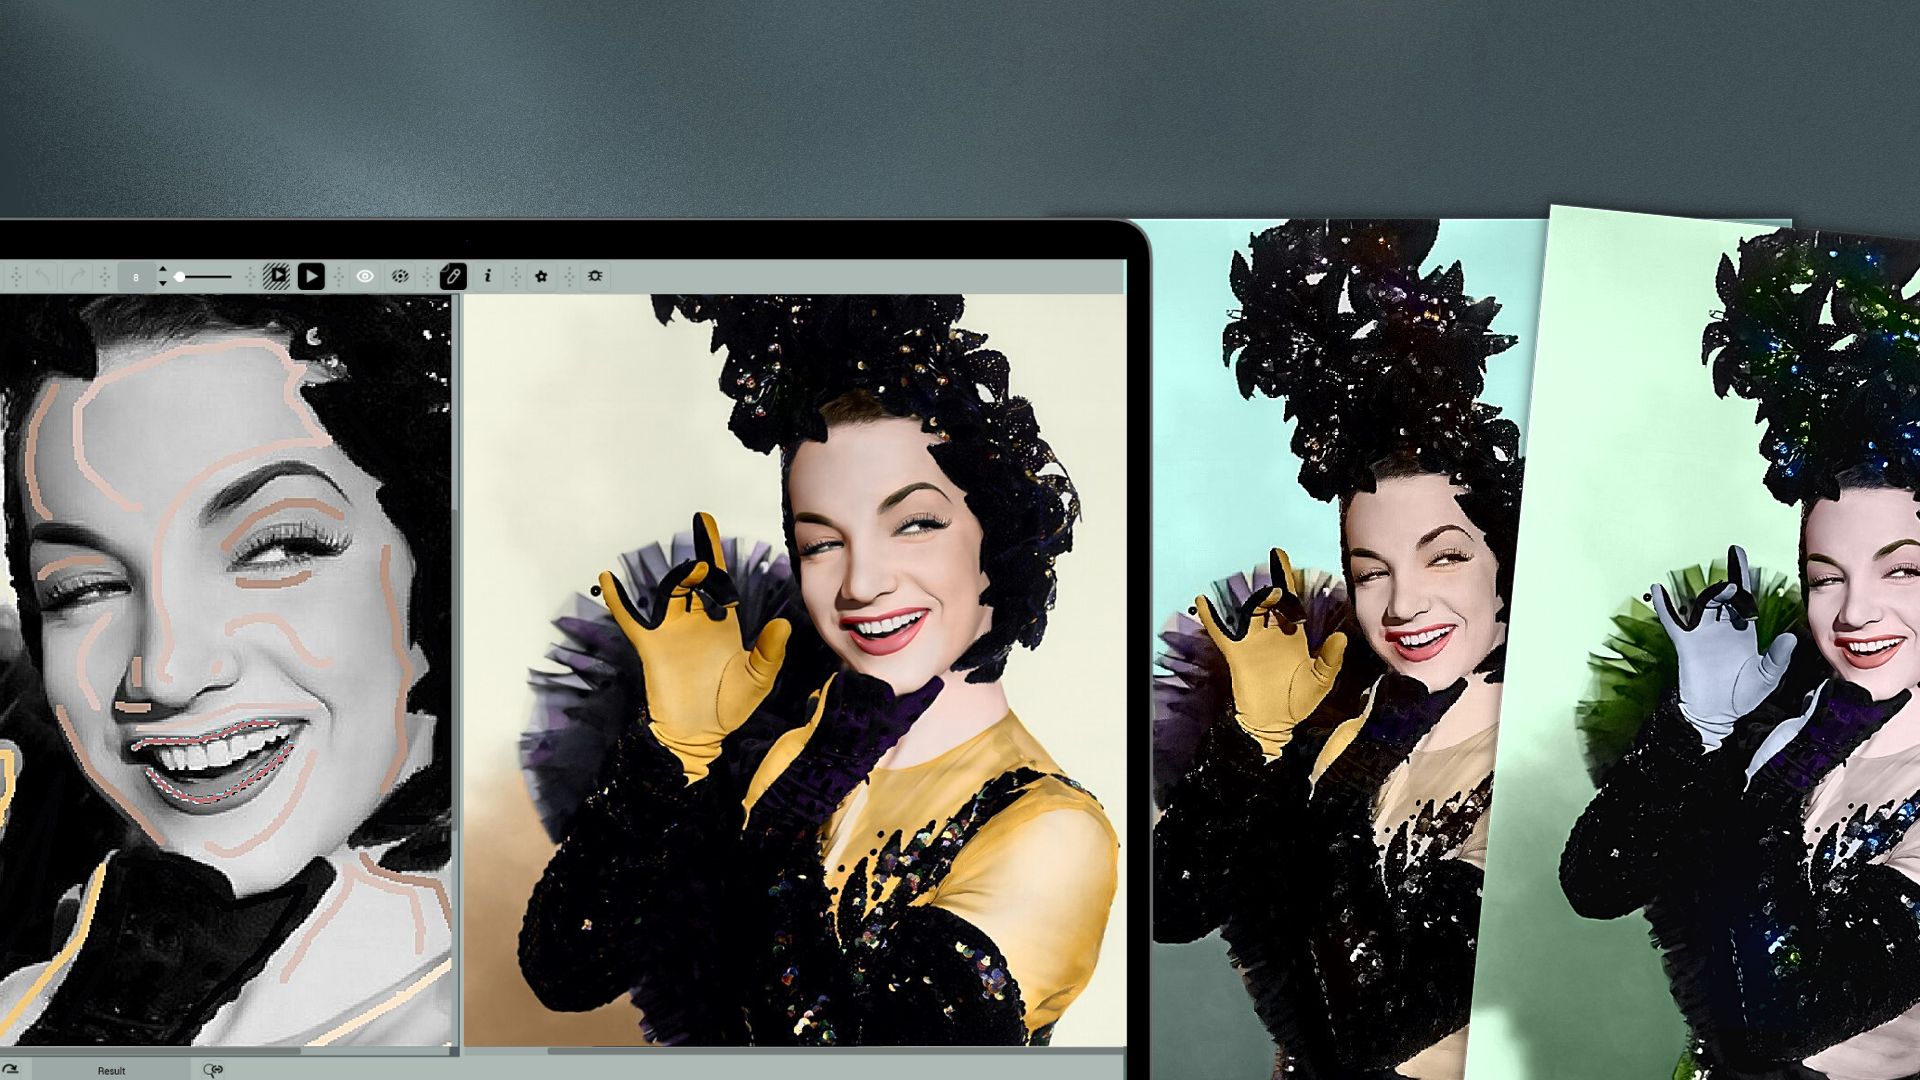
If you want to join the world of photo colorists with minimal knowledge, then the CODIJY course for aspiring photo colorists is for you!

In just one hour, you’ll learn how to bring natural tones to the face and spectacular outfit of Brazilian singer Carmen Miranda, captured in the iconic publicity shot for the 1944 movie Greenwich Village.

In the final part, we’ll also show you how to create several alternative color versions of that photo. By the end of our master class, you’ll be confident in both colorizing photos and using specialized software from CODIJY.

About this colorization

This class is for beginners and is based on colorization created by Phil Johnson, a brilliant colorist from the UK.

Carmen Miranda in publicity photo for the American film Greenwich Village (1944). Source Wikipedia. 

With Phil’s permission, we’re using his warm, rich shades to give you an idea of how to match colors professionally!

About this class

Attached to this lesson is a CODIJY file for training. For convenience, we have broken the colorization process into four 15-minute blocks:

    • setting up the workspace, 
    • mask drawing and coloring the background/outfit,
    • picking and adding colors to facial features,
    • creating an alternate version using the repainting tools.

You will need up to 2 hours and one of the CODIJY programs to complete all the steps. 

Get started with preparation to colorization:

Carmen Miranda: Part 1

1

Open CODIJY Document

The training file to this class comes with ready-to-use palette. It's saved to a CODIJY Document along with the black and white photo! 

Step 1. Save the Carmen-Miranda.mgd file on your computer. 

MGD is a file extension of CODIJY documents. They store photos, masks, colors used etc. 

Step 2. Launch CODIJY  and click  in the lower left corner of the Project Explorer. Locate and open Carmen-Miranda.mgd

2

Organize workspace

CODIJY will open the photo in the Editor. Look at the color selection tools on the right sidebar. 

For this exercise, you’ll need:

    • Color Libraries (Pro) to practice matching colors on your own
    • Color Picker to paste provided HTML numbers
    • Color History to select the ready-made colors 

In some layouts these panels can appear under tabs or closed. 

If the panels you need are located under the tabs, you bring them forward and place at your fingertips!

Open all panels

Close Gradient Options (x). Drag the Navigator to the left corner. Now place the Libraries under the Color Picker. 

You can move panels by dragging them by their headers.

Open the Color Libraries in the floating windows

Note that we'll use Color Libraries from the extended set of the Pro edition! If you work with Recoloring, choose other options.

Step 1. Go to the Libraries tab and select “Color Backgrounds” from the list.

Step 2. Click the icon next to a field to open the selected library in a floating window.

Step 3.  Move the windows to where they won’t interfere with your work. In this way you can open several libraries in advance.

Open History with ready-to-use palette

Ready colors for this class can be found on the History tab. 

If it is closed, activate History in the context menu above the empty area of the toolbar.

The colors appear in the order we use them.

#1-2 lighted/shaded areas of the background, #3 dress, #4 gloves, #5 light part of the dress, #6-7 face, #8 lipstick #9 whites of the eyes, #10 eyebrows, other colors are tones of glitter.

3

Use color numbers

Each color in this tutorial comes with its HTML number. Use the context menu above the input field to simply paste it into the Color Picker.

Now as you have the image open and all necessary tools at hand, let’s move one to applying colors!