Quick-Start Guide

get started with CODIJY

Get to know CODIJY software in minutes! Download this simple example and follow us to learn how to colorize, recolor, and partially colorize photos with ease! 

Contents

Introduction

This guide is to take you though your first steps In CODIJY. It offers a simple example of applying CODIJY technologies, in the way that would allow you achieve superb results with your own images as quickly as possible!

Still, if you feel confident in your skills and want to proceed to the more challenging tasks, we would recommend checking out: 

this guide requires

Get prepared

This easy example will let you quickly test the way CODIJY applies colors and learn how to edit, remove and substitute colors in your own photographs. 

Step 1. Save the below image to your computer: call the context menu ( right-click the photo below on Windows or control-click on Mac) and select the Save Image As command.  

Step 2. Launch your CODIJY application   

The program opens Project Explorer that lets you open images and quickly access  CODIJY files on your drive.    
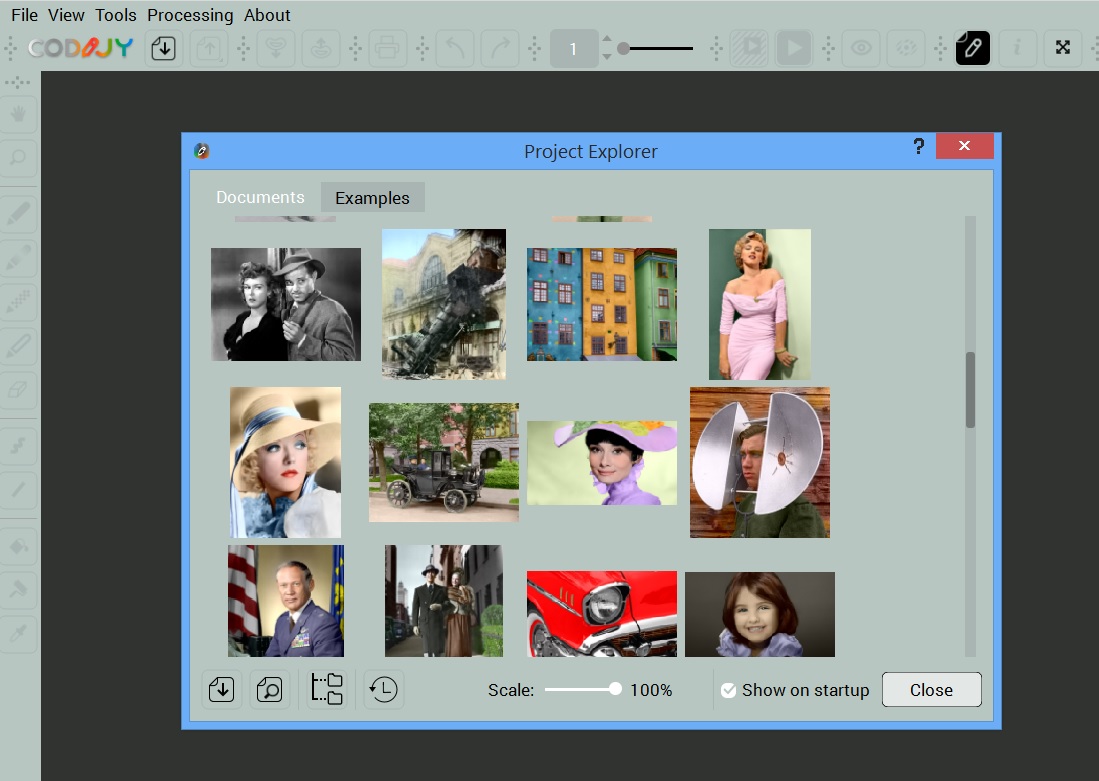
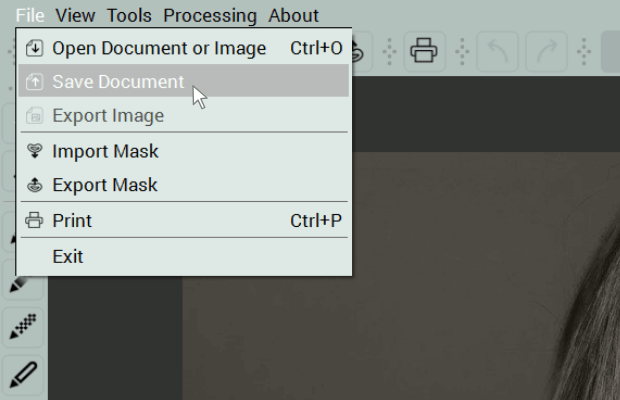
Step 3. Click the Open  icon in its bottom left corner. Alternatively, close the dialog and access the Open Command on the toolbar. 

CODIJY opens the image in the Editor. Here is what its window will look like. 

Create a CODIJY document

Next, we recommend saving your photo to the CODIJY document. 

Save document toolbar command
Save document Menu command

discover position of the key tools

Check the position of the Pen, and the Image Processing button. In some layouts both buttons may appear either on the left or in the top toolbar areas. 

Open any Library in the drop down list of the Color Libraries window.  Open the History Window (it will be empty, when you open a new image).

add colors to the photograph

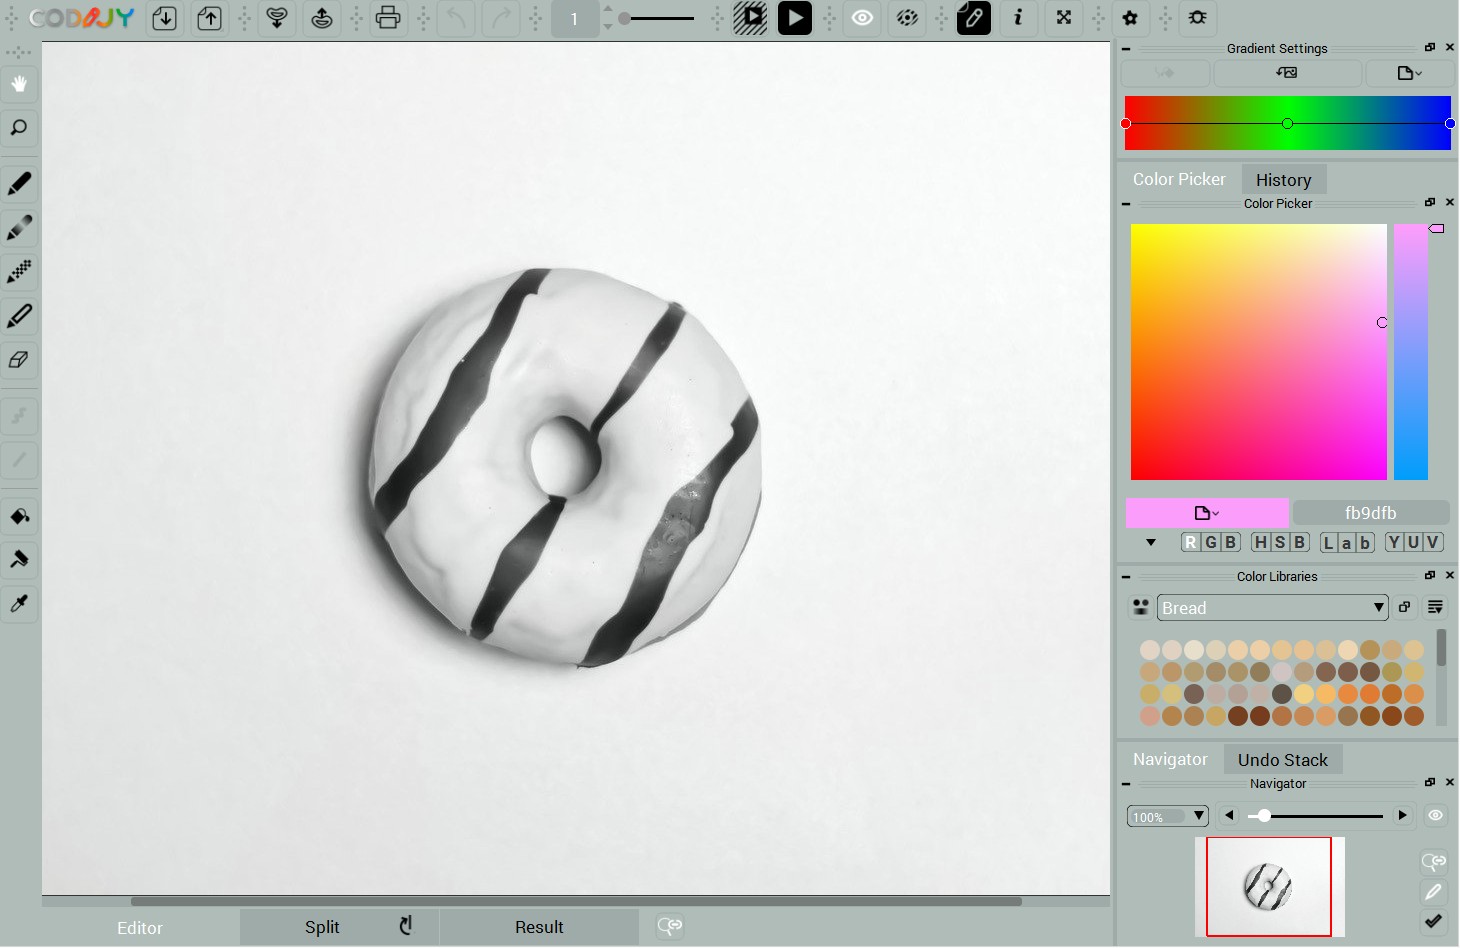
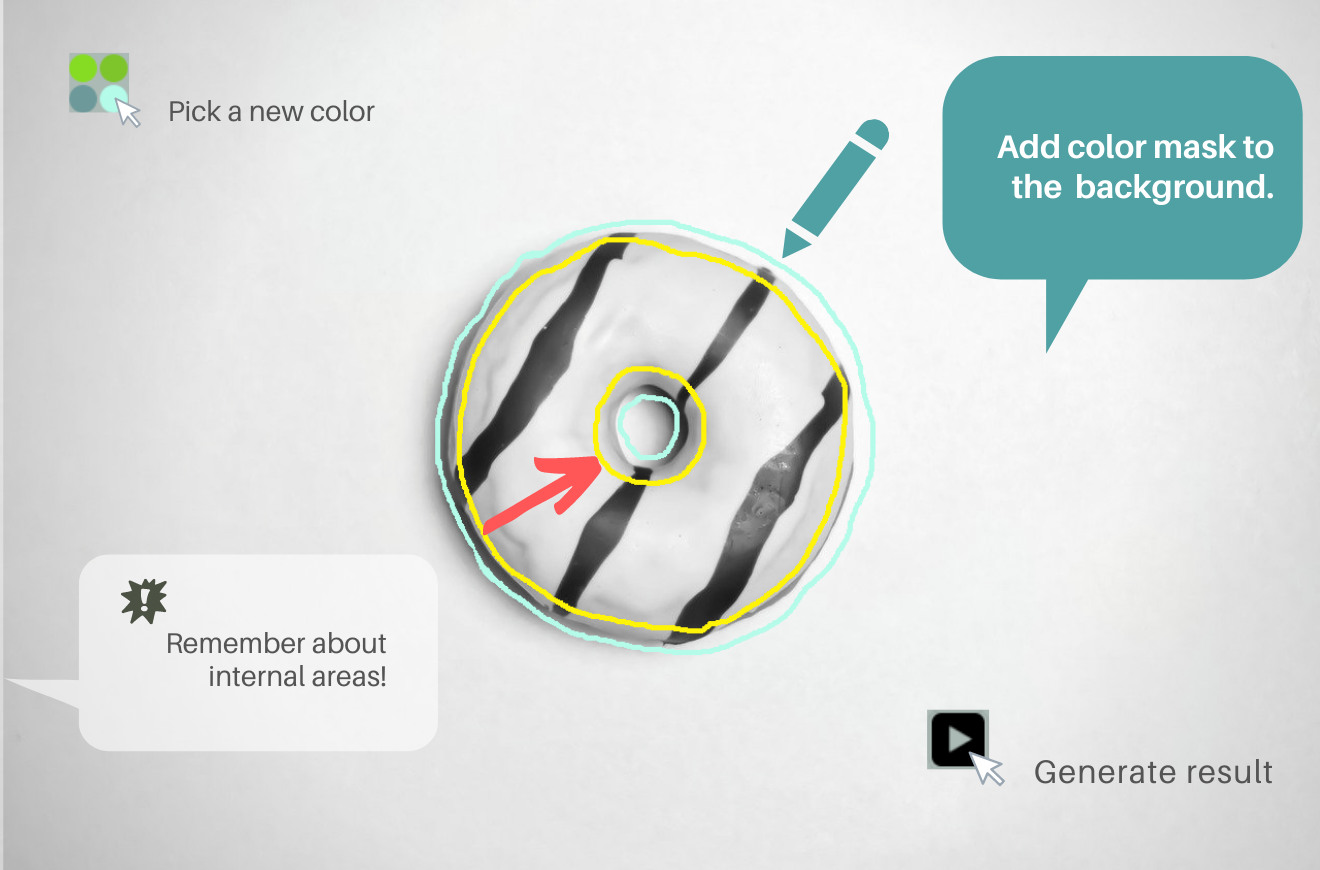
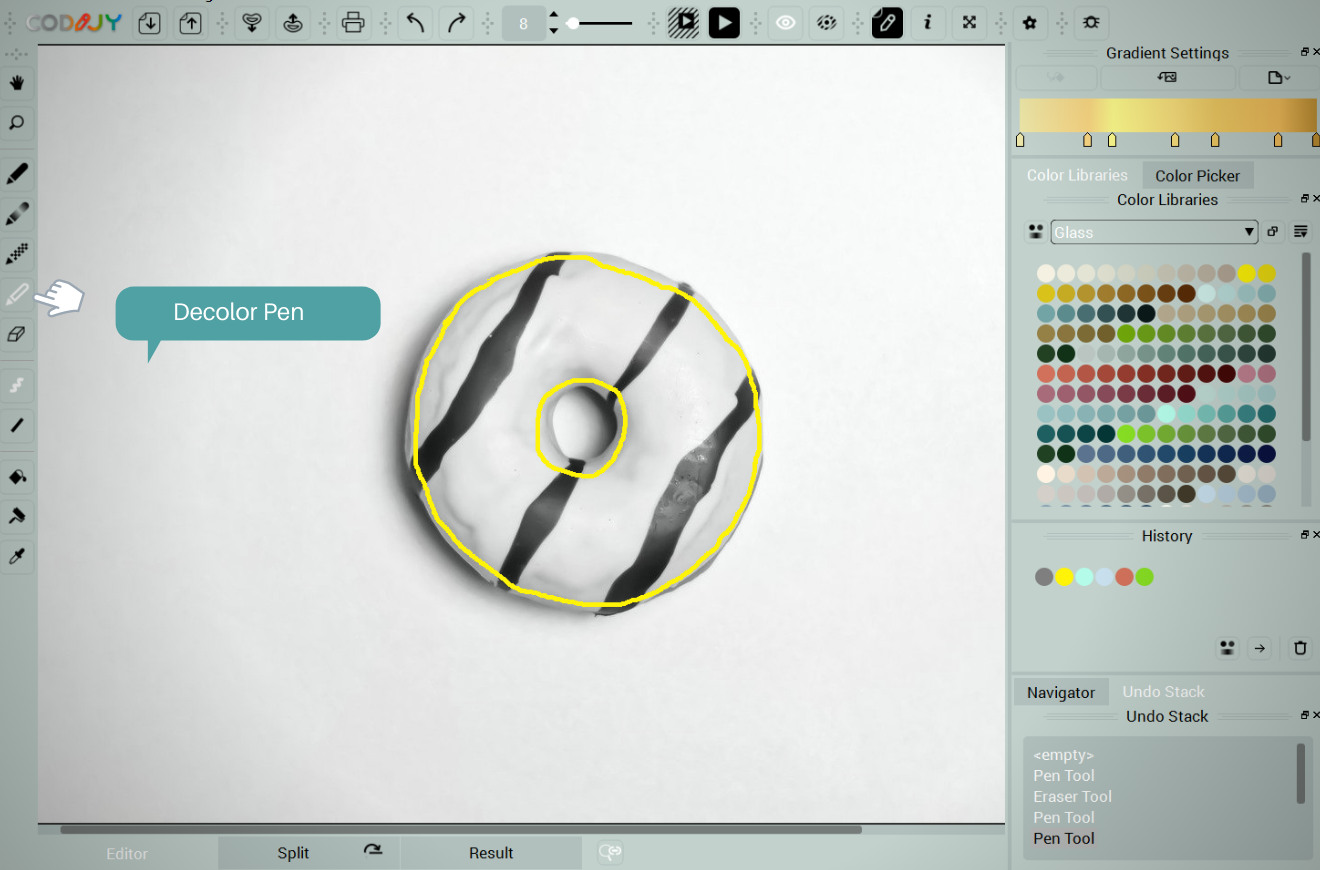
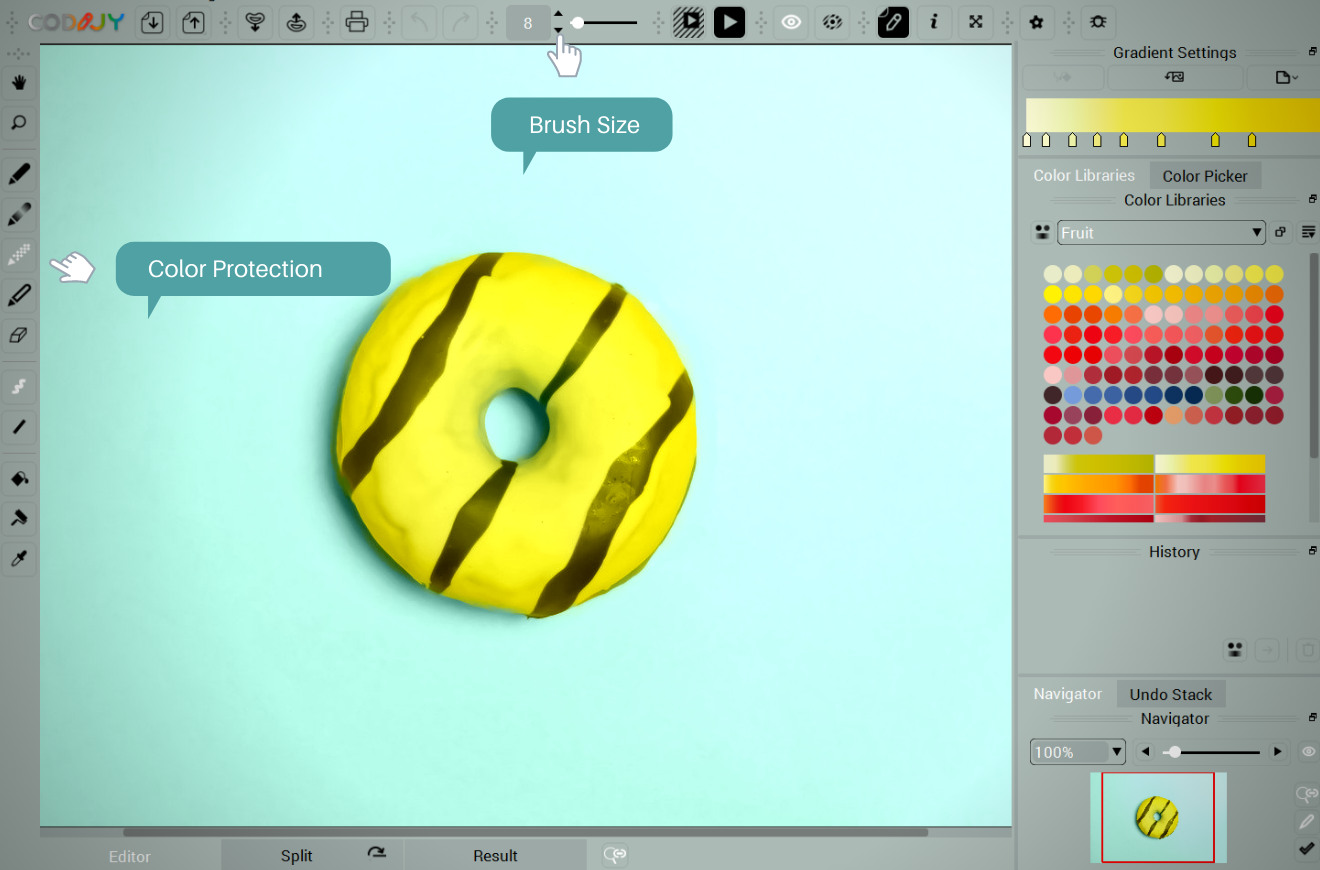
As you know, you can add colors to the image by drawing simple strokes called masks. Masks let us pass CODIJY the approximate position of the border that we want the program to respect and the instructions about our preferred tone for each image area.  

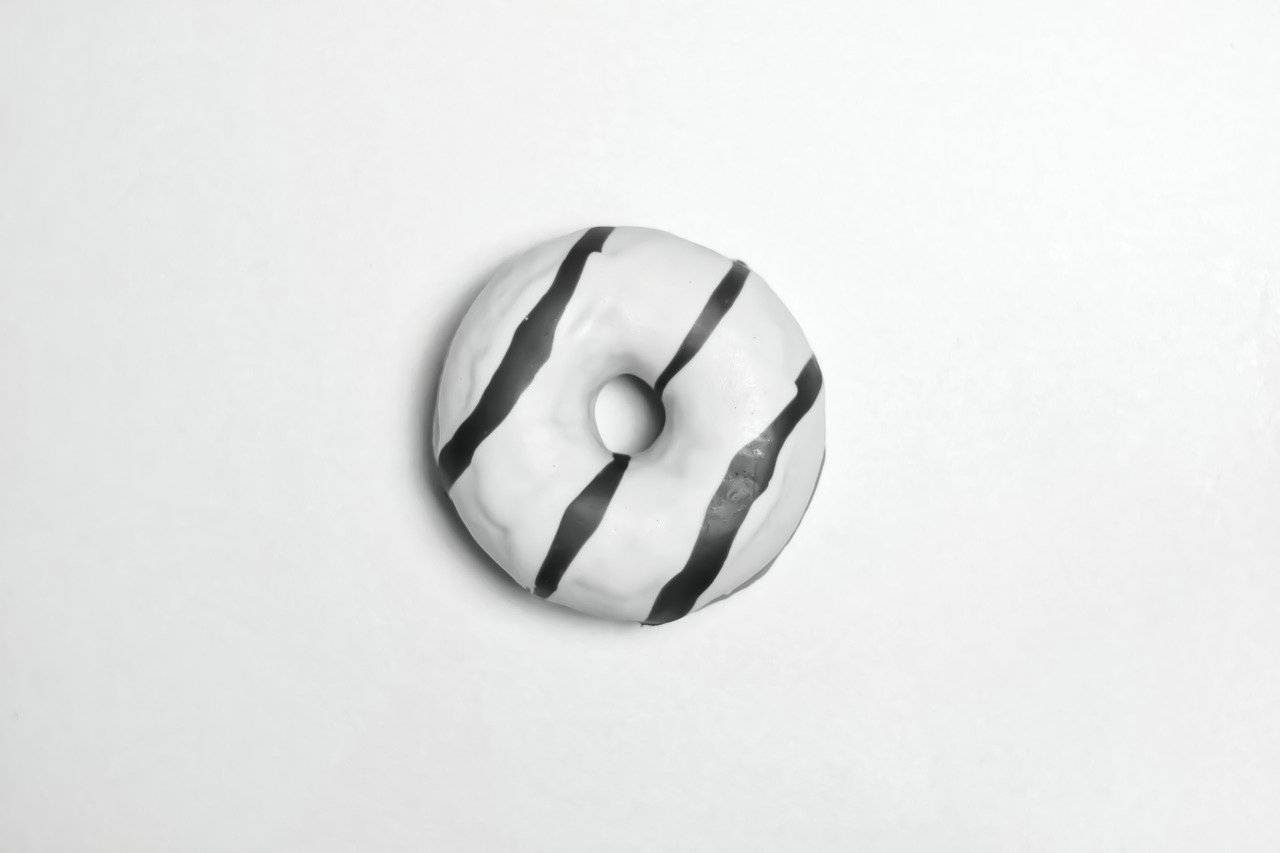
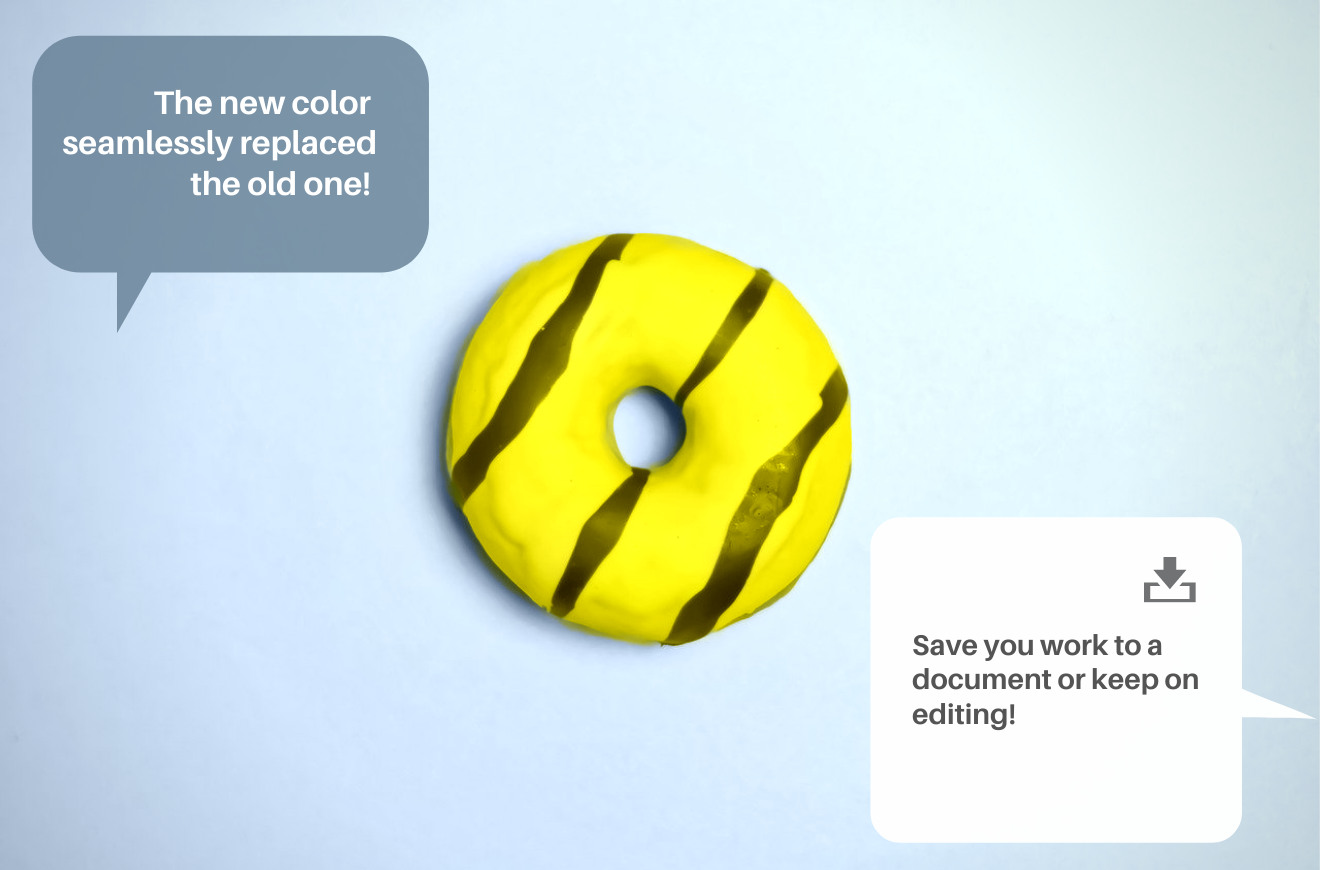
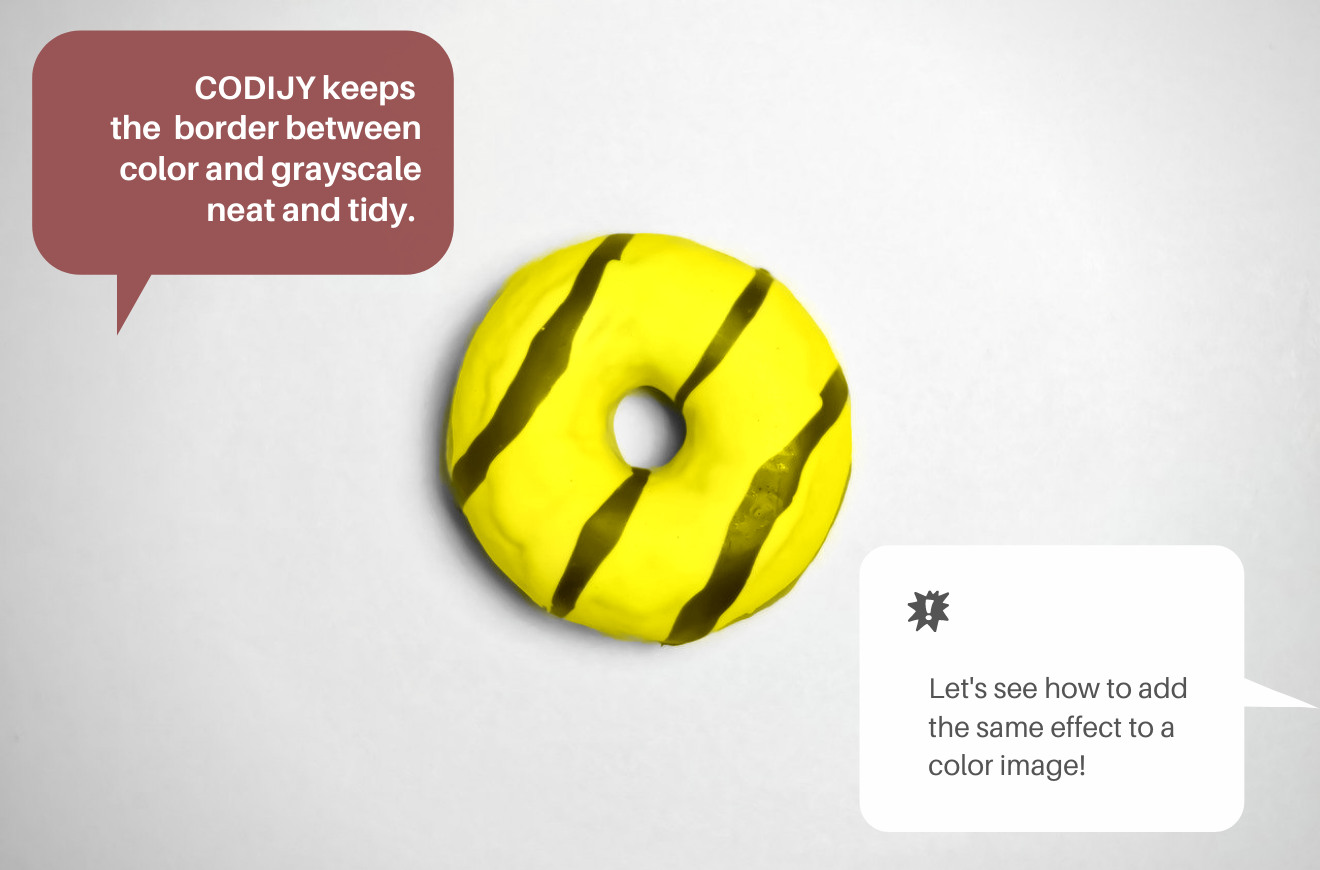
In our example,  we want to colorize the doughnut into the bright tone of yellow. For this we will circle its outer border from within.
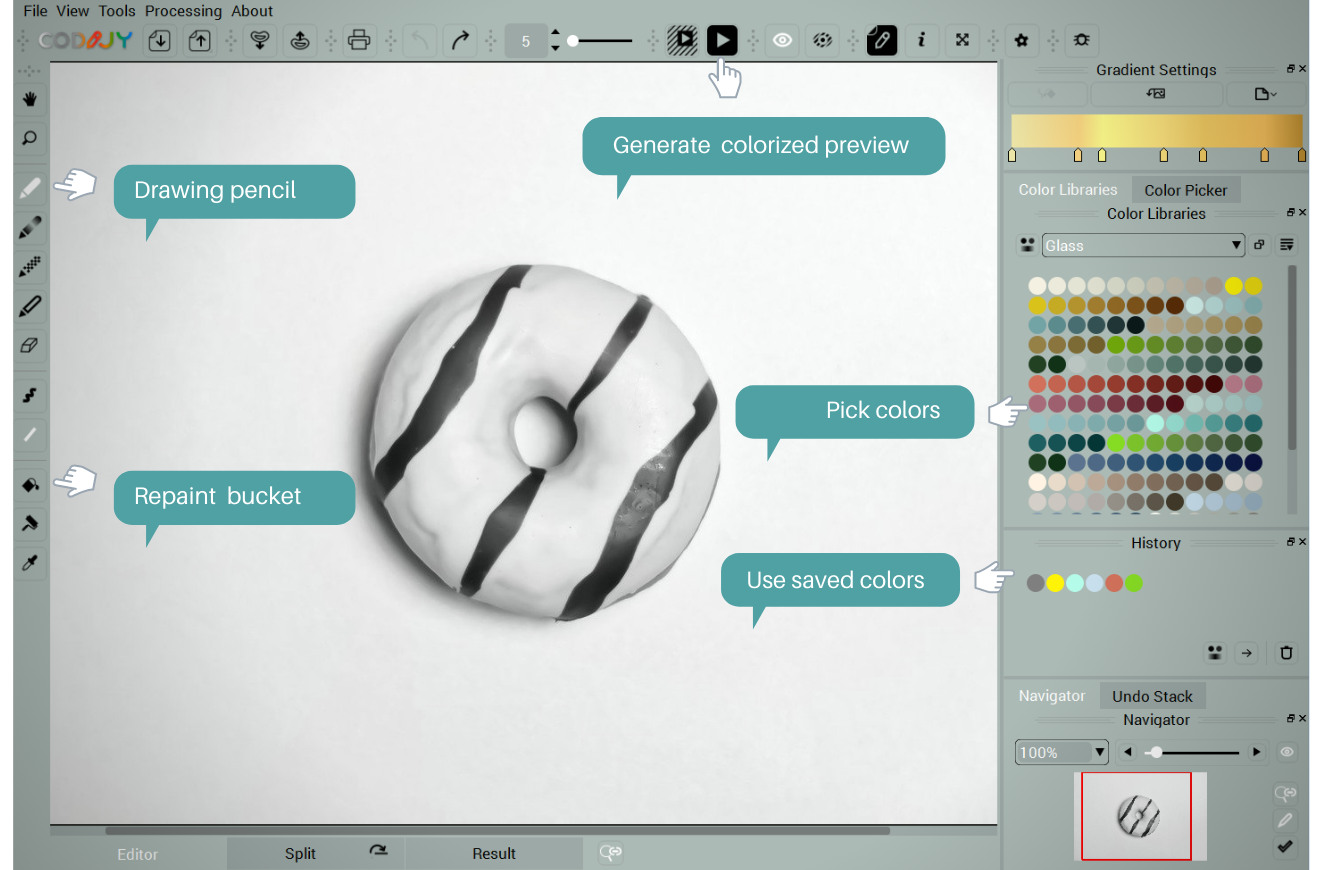
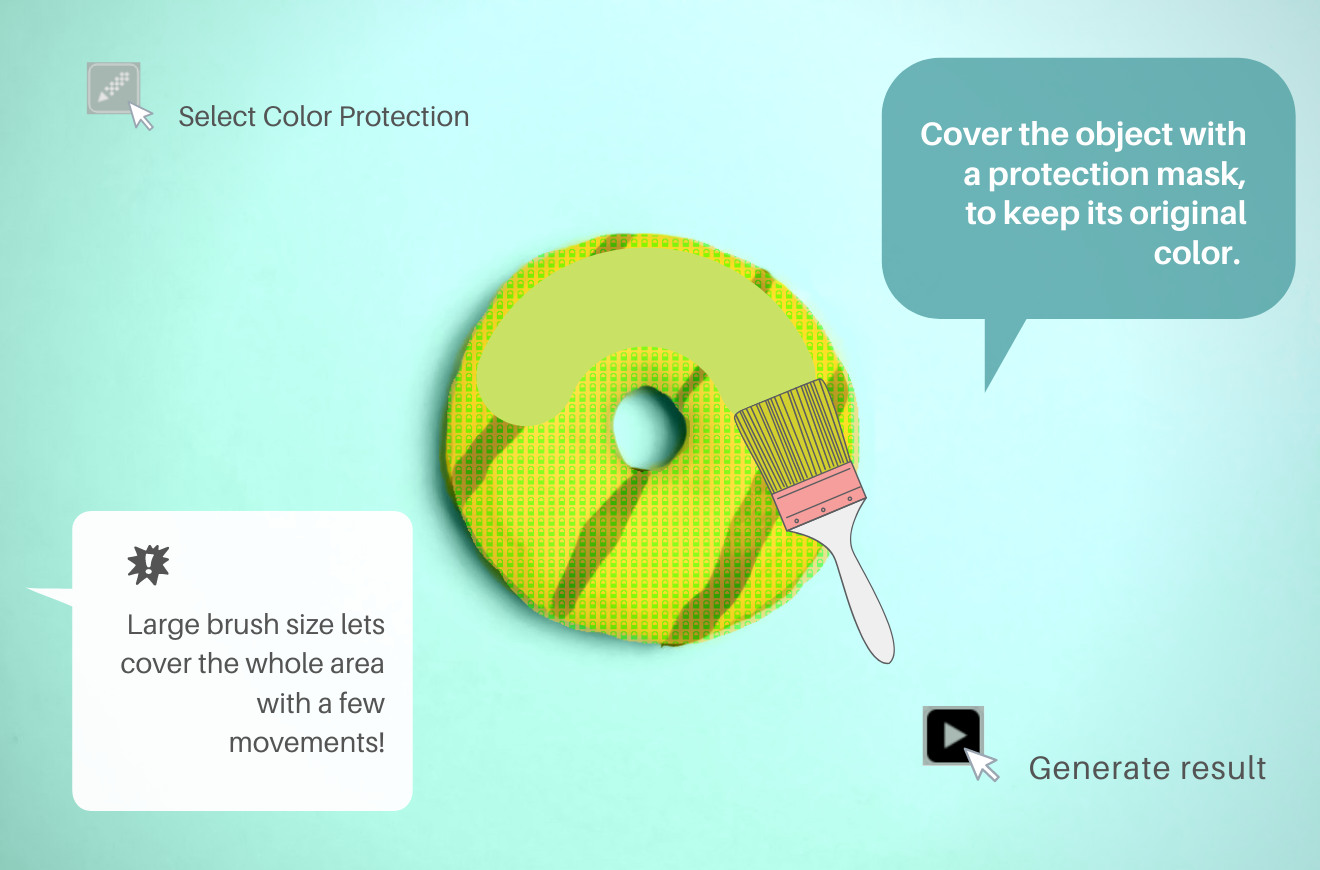
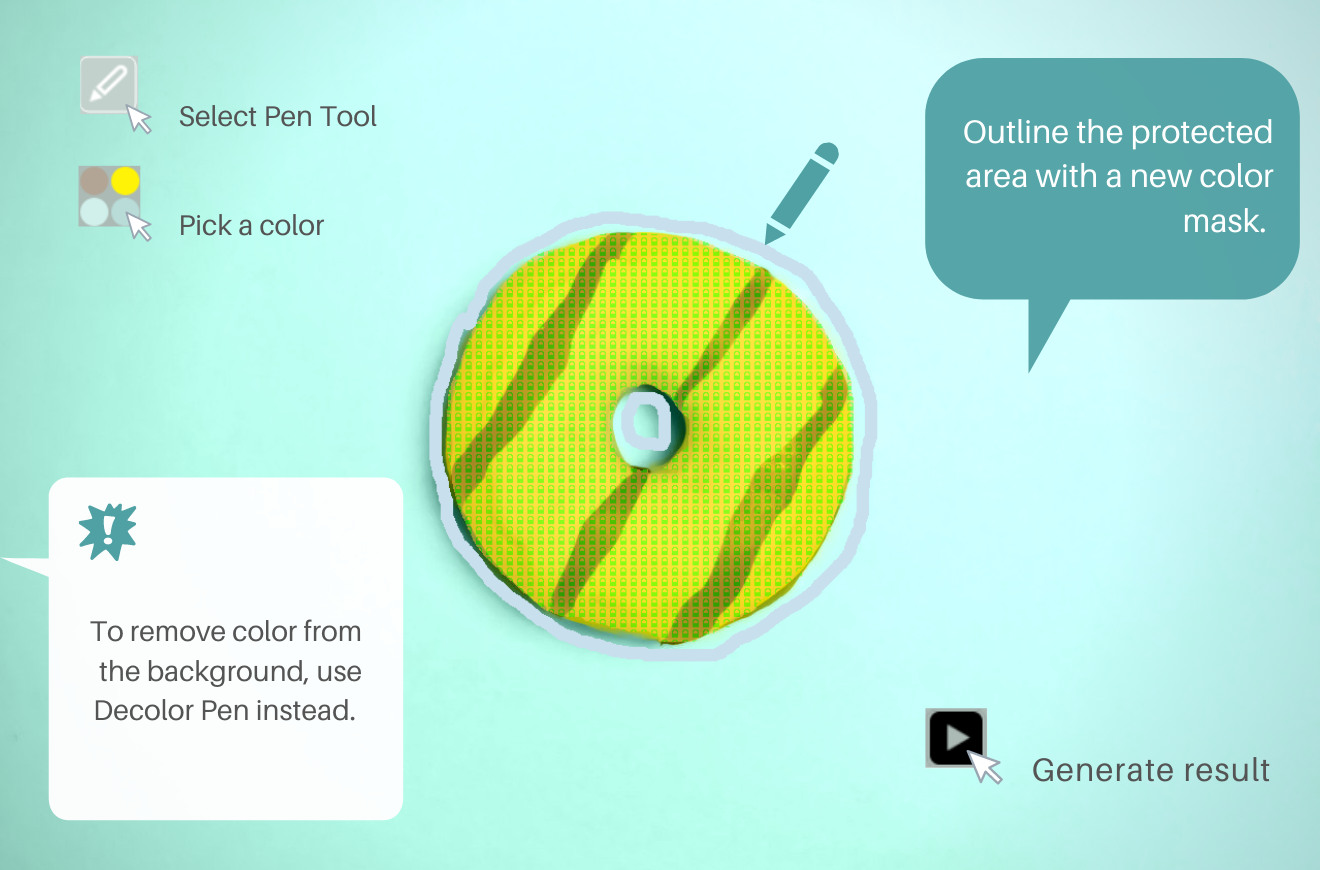
Step. 1 Select  Pen tool (P)  

Step 2. Switch to freehand mode by pressing the ‘F’ key or its icon 

Step 3. Pick a color from the Color Library  

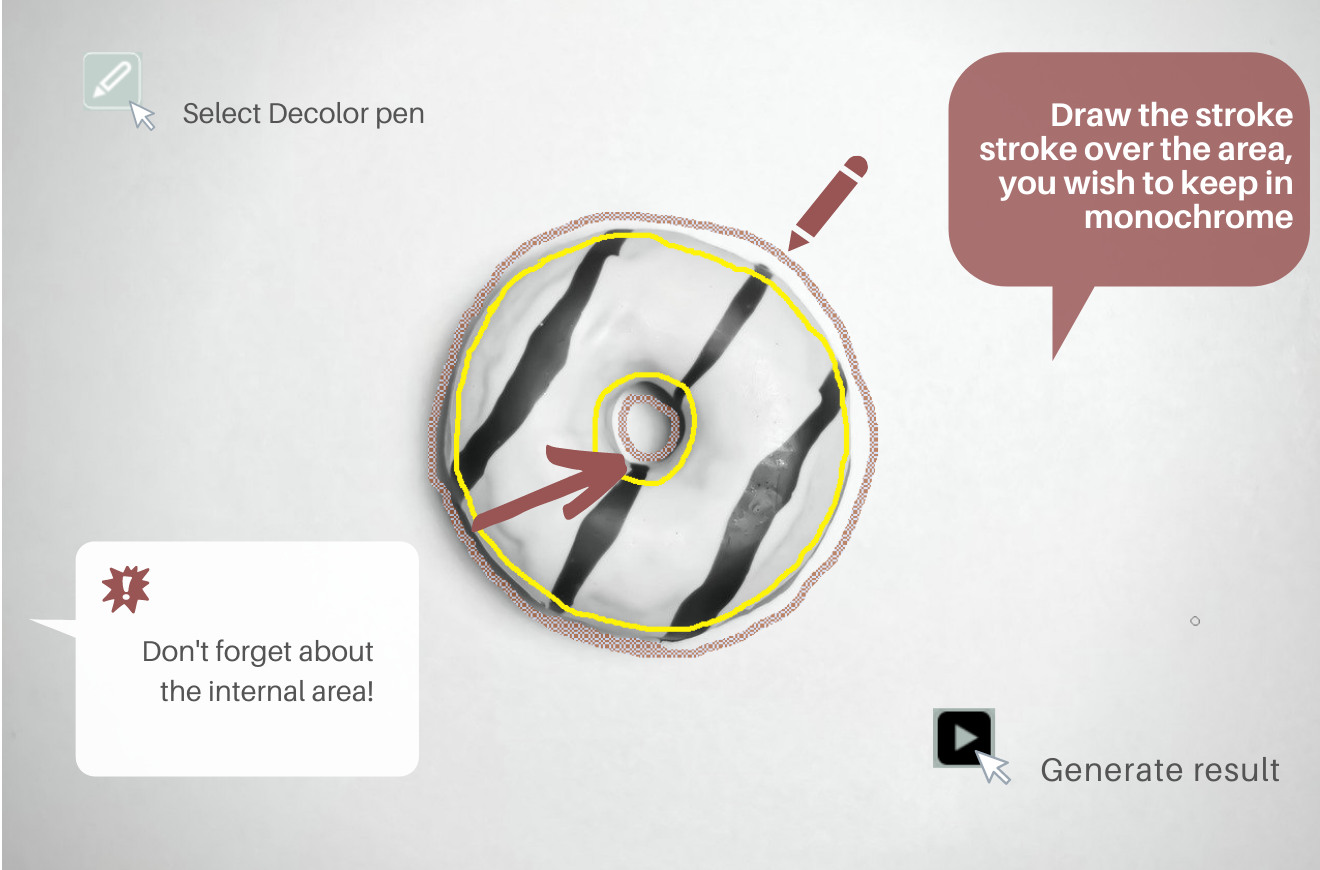
Circle the area. Keep close to the boundary – you don’t have to be overly precise though. Still, try not to step on the border.   

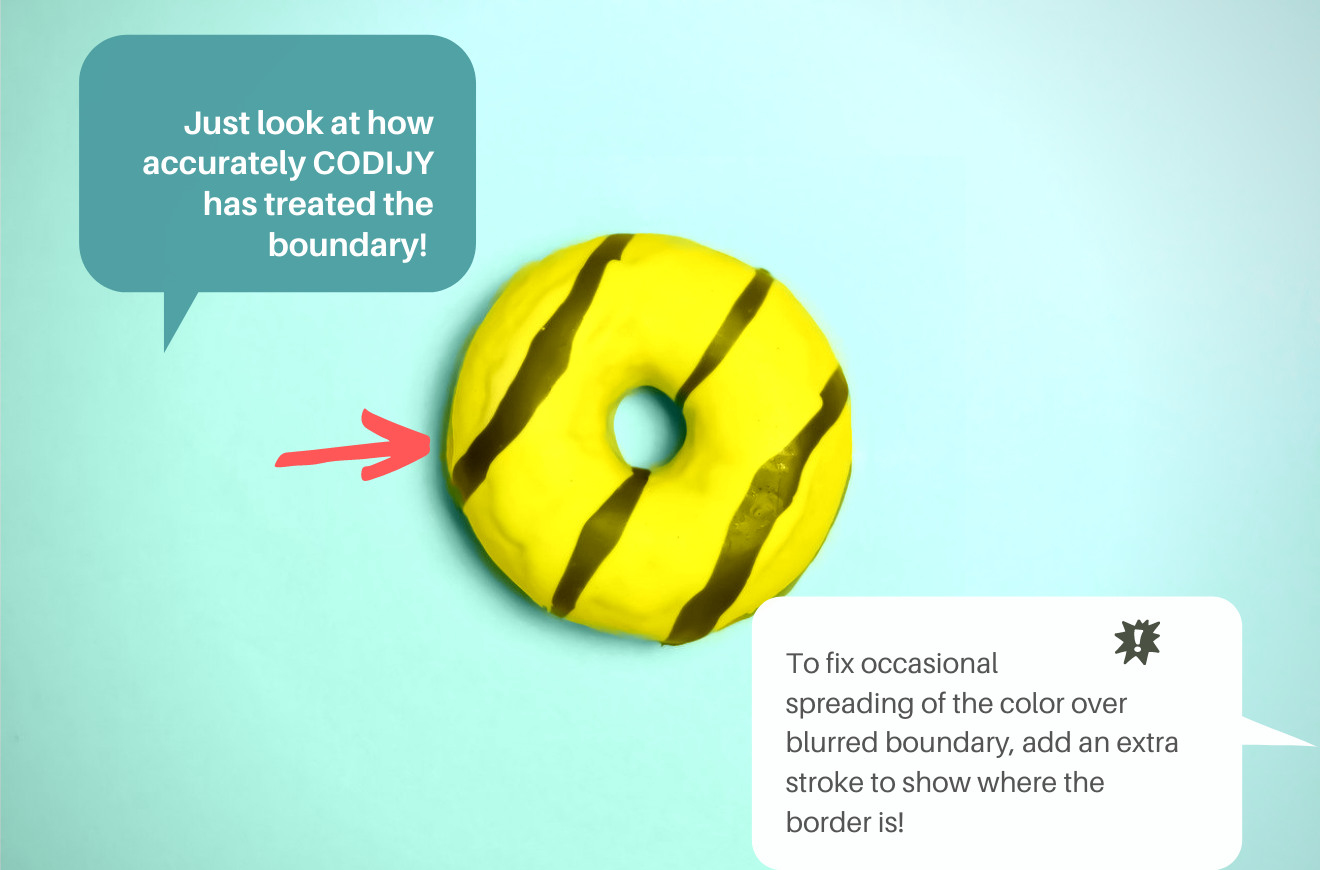
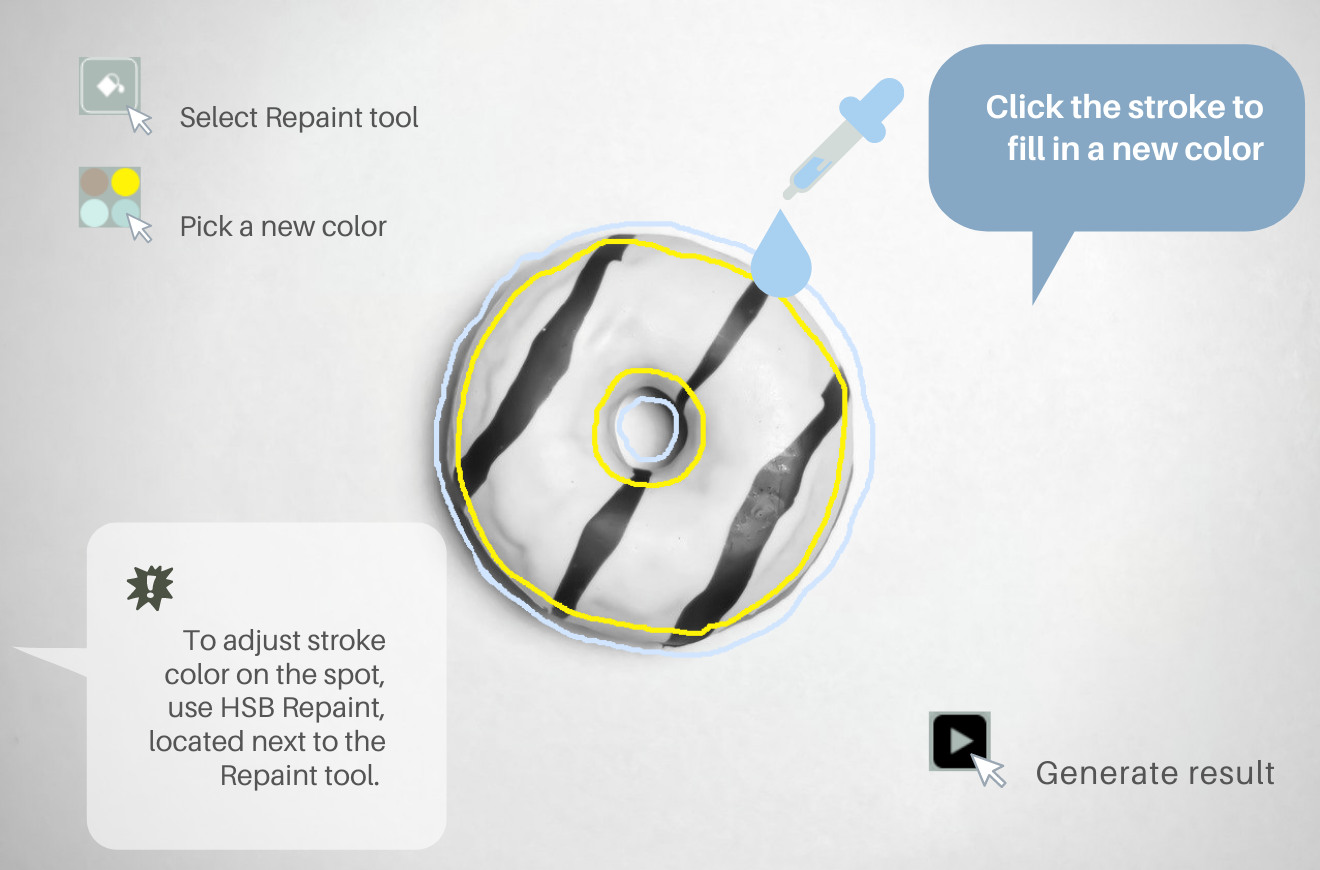
Step 3. Generate the colorized result. 

Option 1. Click the Image Processing button  
Option 2. Press Ctrl + R (Win)/ Cmd + R (Mac))

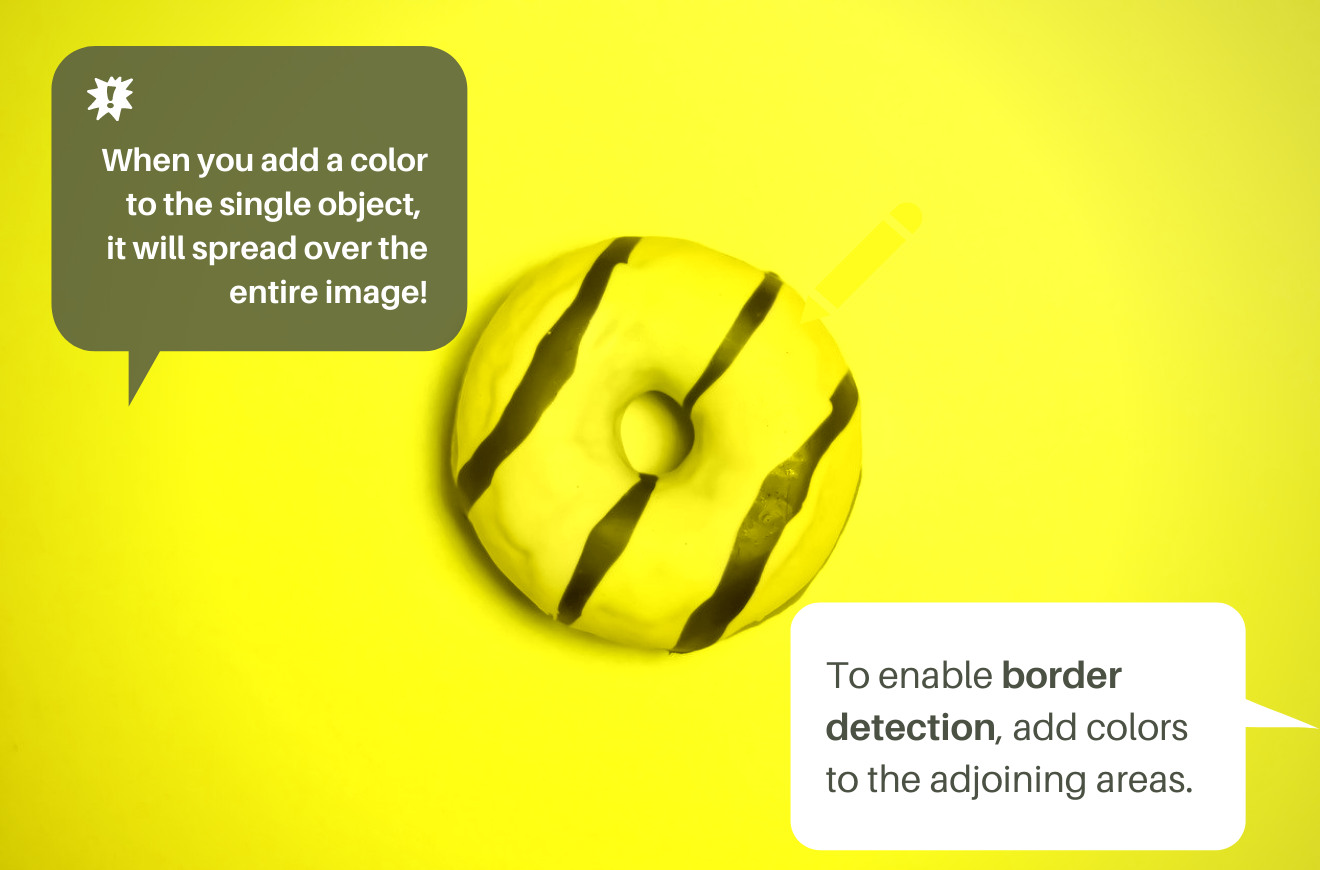
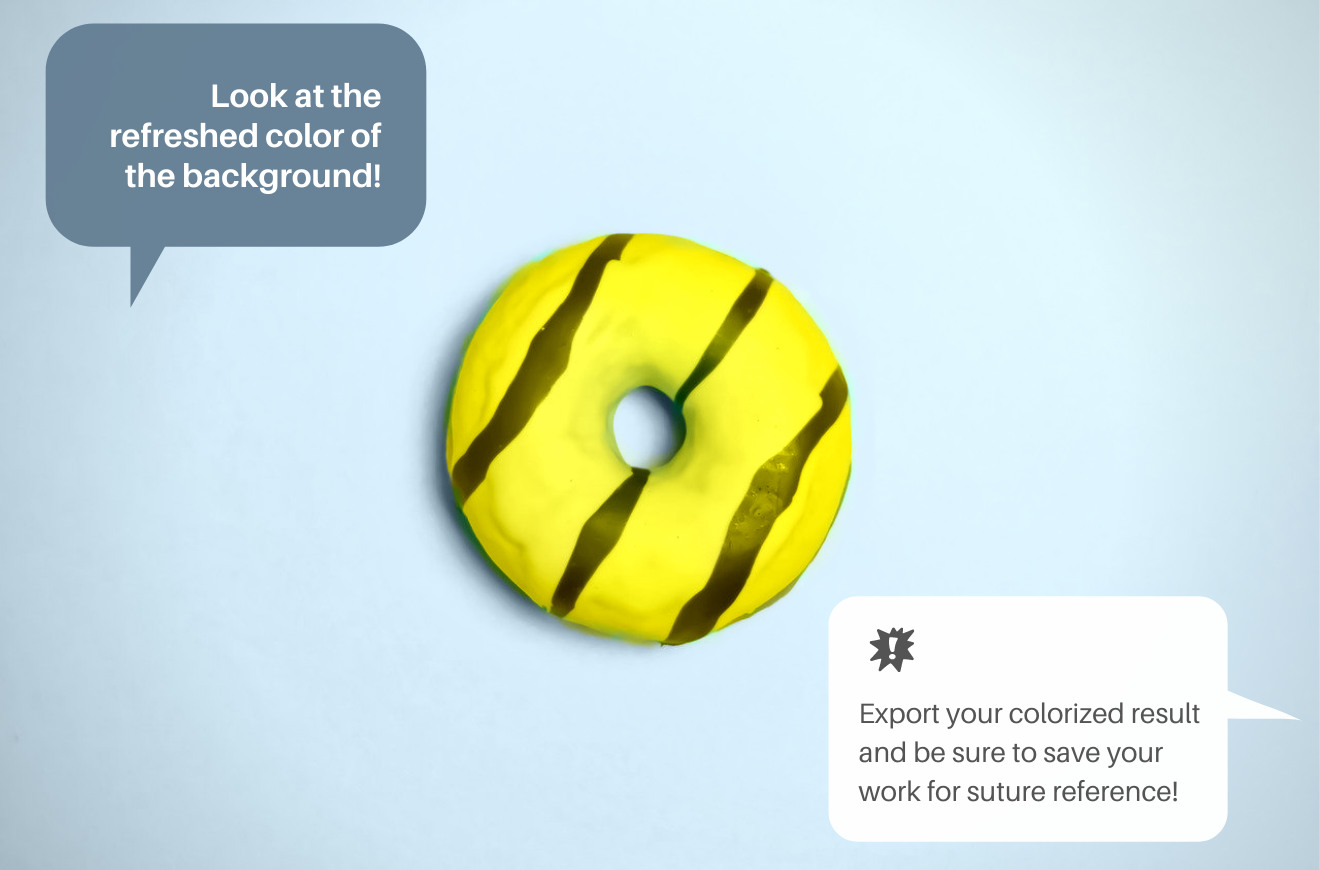
CODIJY has colorized the whole image in yellow. Why? 

As we have not provided the color for the background, CODIJY has ignored the boundary and applied the tone to the entire image. This happens when CODIJY lacks instruction on what to do with the adjoining areas. This is why there is no point to generate the result when you added just one color.

Now let’s add another color to the background and see what happens!

Step 4. Outline the outside and inside background zones with a different color. 
Step 5. Circle the internal border of the doughnut with the yellow color to avoid spreading of the background color across the internal border

Generate preview and check out the result. This time CODIJY algorithms has respected the common border and applied both colors precisely!

the thikness and shape of the mask

Now lets talk about the color masks in depth. How does the width and the shape of the mask impact the quality of colorization? 

Though the width of the mask may make CODIJY push the applied color slightly farther to the border you don’t have to make the mask excessively thick. If the underneath zone allows it, draw the mask with 5-9 pixel brush. It will let you e.g. comfortably fill the mask with a new color without scaling up the image.      

Speaking about the shapes of the mask, your are free to draw either contours, lines or dots. The shape of the mask doesn’t impact the result, when the borders of the objects are clear and the mask defines the approximate position of the boundary sufficiently. 

Why I don't get the result immediately?

Note that masks do not colorize the area by themselves. Instead, they pass your color instructions to CODIJY algorithms. The actual colorization happens automatically, after CODIJY receives your command to generate the result!

Both CODIJY Colorizer Pro and CODIJY Recoloring let you generate the colorized result of the whole image or it’s part after you finish drawing masks. 

Additionally, CODIJY Colorizer Pro features the Instant Preview mode. It allows you to make CODIJY generate the result for the whole image or a selected area in the real time. When the Instant Preview mode is one, the program will switch to the Split view to display the outcome of your efforts side by side with the Editor.    

How to aviod spilling of the color?

To identify the borders between adjoining areas automatically and apply colors neatly within the boundaries of each zone, CODIJY employs the Border Detection technology.  

If the area is not large and the border is clear, this technology will let you do with a simple dot or stroke. 

When you colorize the backgrounds, the large-size areas or objects with the blurred borders, it’s better that you draw a contour that follows the border quite precisely. This will eliminate the chance that CODIJY will interpret the edges incorrectly which will  require drawing additional strokes to correct the result.   


How do colorization algorithms work?

CODIJY algorithms analyze the tone of the chosen color and substitute each pixel of grayscale with the pixel of the related shade, preserving the brightness of the original.

For this reason, you won’t be able to make the area darker or brighter by picking the tone of the different brightness and saturation.  Look at example on the right: the tone of the outside mask is darker then the mask inside, still the colorized result is almost the same.

This method ensures the realistic reproductions of any surface and texture in the chosen colors.

change the color of the mask

If you want to change the color of the strokes, pick a new color, select enable the Repaint tool (R) and click the mask.  

HSB Repaint  You can also edit the Hue, Saturation and Brightness of the stroke right on the spot. Check out the use of the HSB Repaint tool – it helps save you lots of time and your creative energy. 

Turn the background into monochrome

If your image contains black white or gray objects, there is no need to pick and apply the related tone. Simply use the dedicated tool called the Decolor pen. 

Draw same contour, as you do with the color mask. 

This tool will remove all other tones and convert the area to grayscale. 

Note that in many cases the objects that look black, white or metallic are not in grayscale unless they has been captured against the white or black backgrounds and do not reflect any other colors. Still, if they are small steel parts, there is no point in putting too much effort in the reconstruction of the exact colors. In this case the decoloring masks will come as the huge time savers. 

Recolor an area in the color image

If you want to refresh the colors of an old photograph or add a nice color accent to a color image, CODIJY can help you with this task as well!

Protect the colors of the area you wish to keep intact. We recommend covering it with the protection mask completely. Maximizing the size of the brush would let you cope with its drawing faster! 

Now outline the area with the new color and process the image!

As you can see, CODIJY has applied the new color without mixing it with the old color. This happens, because CODIJY converts the unprotected areas to its grayscale version it uses for calculating the proper tones. 

Export Result Preview to the Image

You can export the color result  to PNG, JPEG, TIFF and other image formats.

Option 1. Go to File -> Export Image

Option 2. Click the Save Document Icon. Hold it for a second to call a drop down menu. It will offer two options: Save Document or Export Image.

Colorize a photo for practice

If you want to experiment with some other images, feel free to pick one of the example below. 

Colorizer Pro

15-day trial

Try the magic art of photo colorization with CODIJY Colorizer Pro! Explore all its features for 15 days absolutely risk-free! Create superb colorizations and save them to CODIJY documents (*mgd files) without limitations. 

Explore all its features for 15 days absolutely risk-free! 

Available for Windows & Mac. Get the download links to your mailbox!   

This is one time email. 

(*) Watermarks will disappear from the colorized preview, after you open saved CODIJY documents in the registered version.