Starter Tutorial

Vintage Car

Author

Vera Zvereva, Colorizer, CODIJY

Learn to add, edit and remove colors in CODIJY. Get the feel and gain your first colorization skills with this simple photo example! 

this tutorial requires

Introduction

What is the best way to draw color masks? How does CODIJY interpret and apply colors? You will soon get the answers, if you try this glossy example!

In this tutorial you will learn how to:

  • add color masks to large areas quickly
  • convert areas too grayscale
  • edit the color of the masks with the HSB Repaint tool
  • export result and save your work

The image contains several large areas. We will add colors to  the hoodfendersgrill and the emblem. The parts like grill framebumperwheel cap will look equally perfect, if we leave them in grayscale.

Watch the demo:

Get ready

Step 1. Save the below image to your computer.

Photographer Frank Pizzacalla

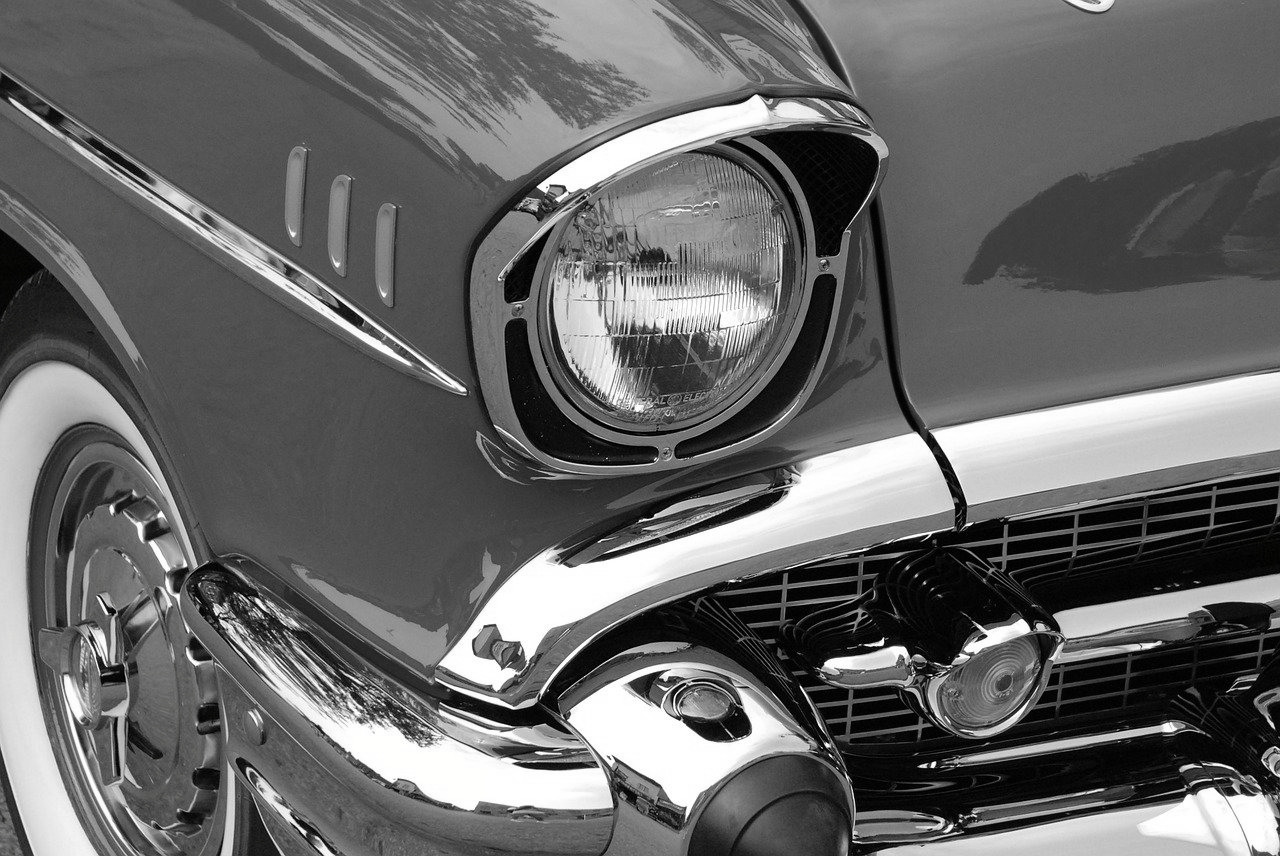
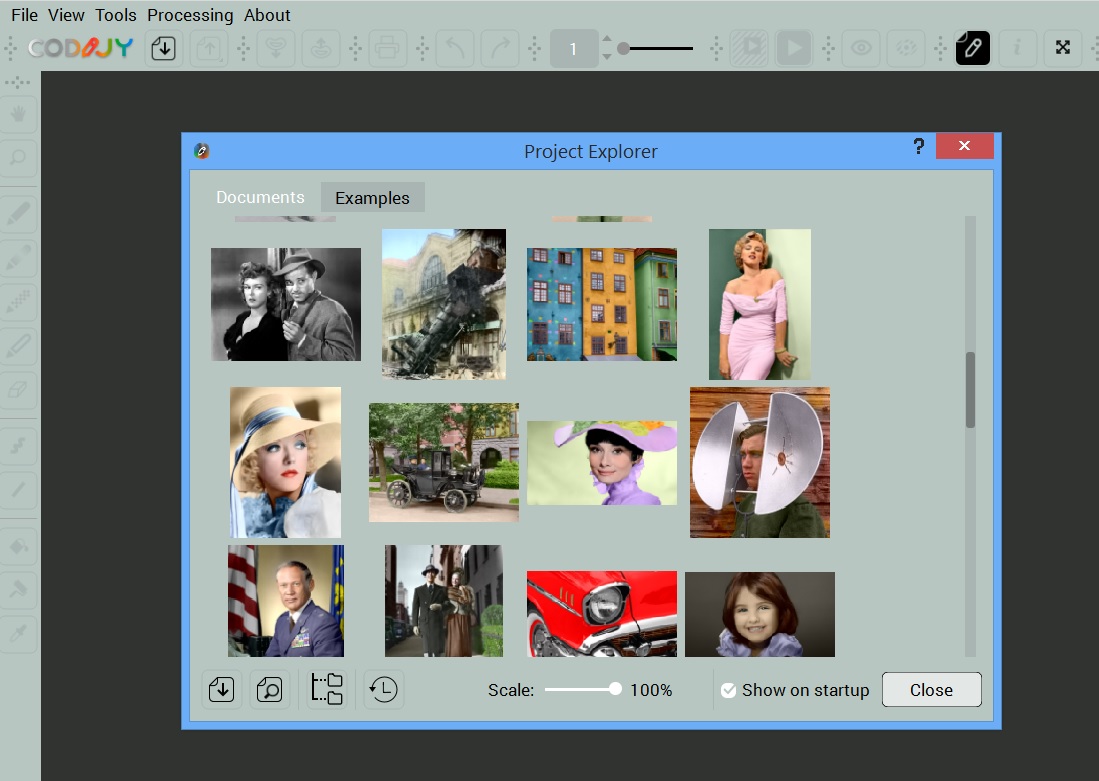
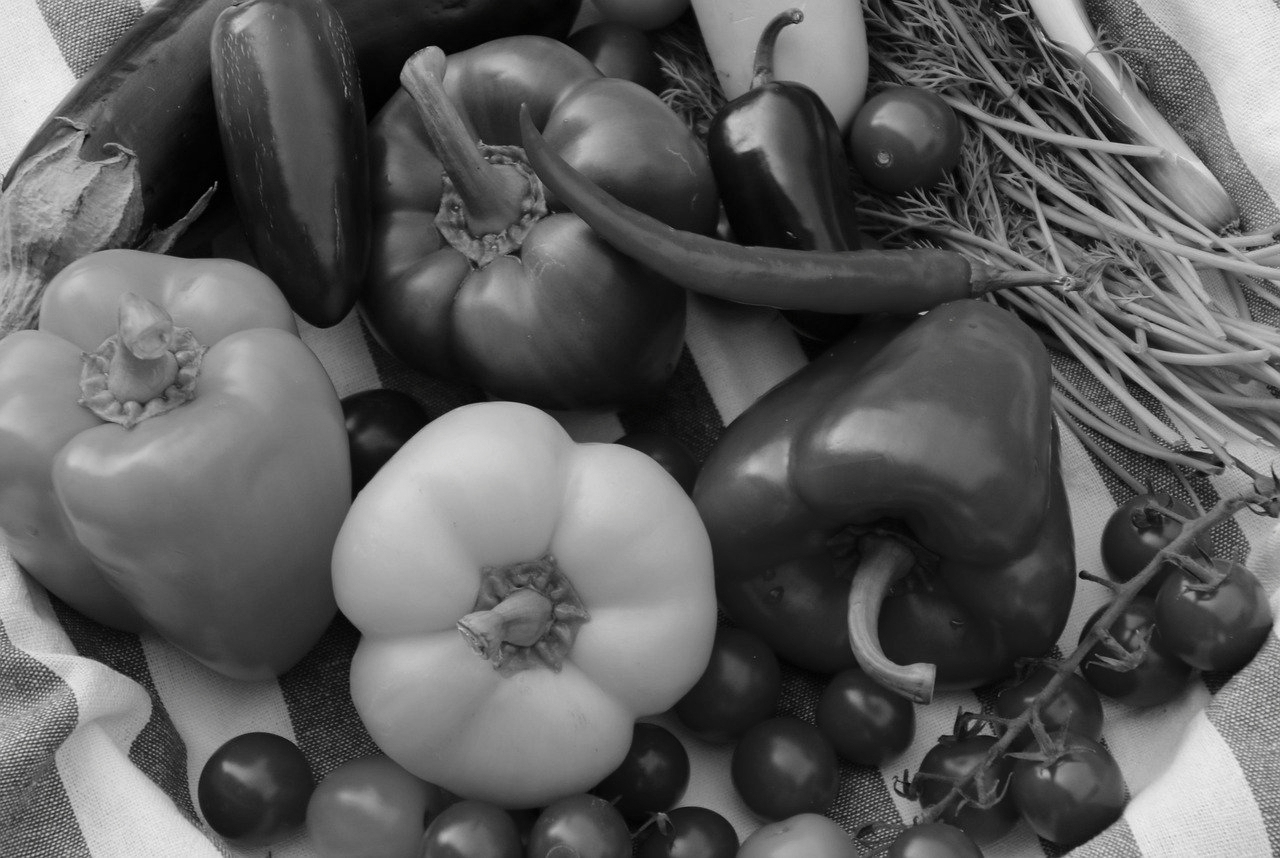
Step 2. Launch the CODIJY application. Open the image from the Project Explorer or from the File menu. Alternatively  press Ctrl + O (Win)/ Cmd + O (Mac).

Step 3. Create the CODIJY Document.

Get Started

Now, let’s get prepared for drawing masks. 
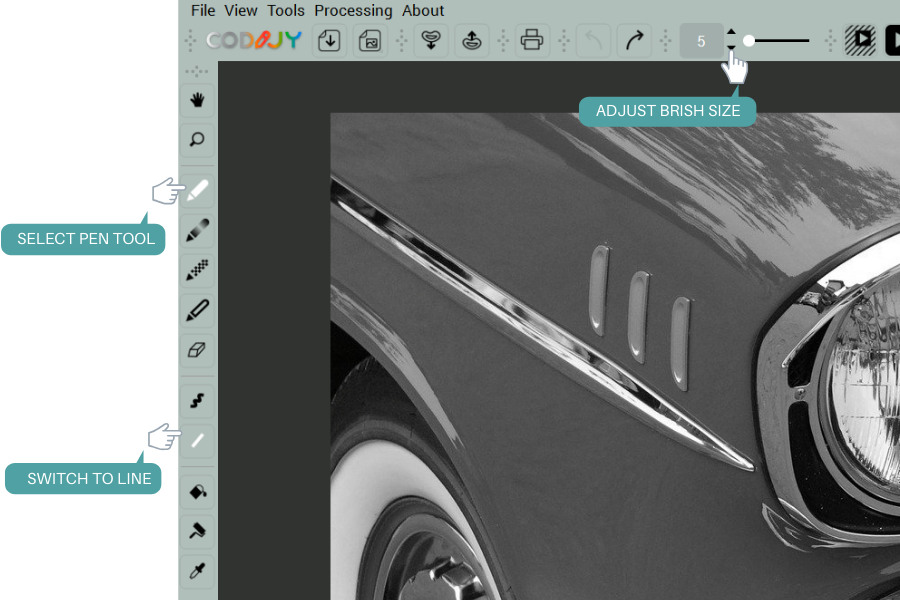
Step 1. Enable the Pen Tool  .

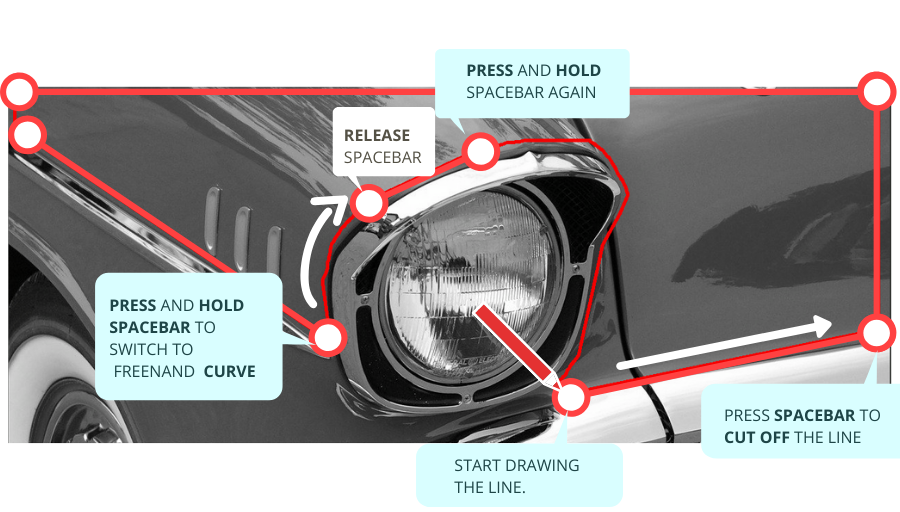
Step 2. Switch to the Line Mode Adjust the brush size to appx. 5 pixels. The thickness of the masks does not influence the result. Still, they will be easier to edit. 
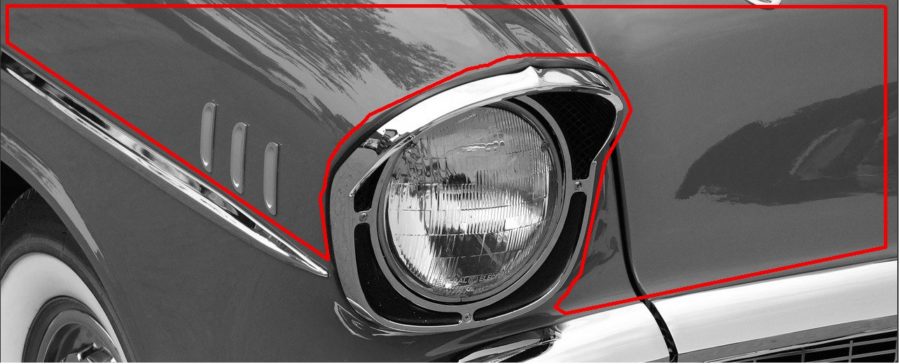
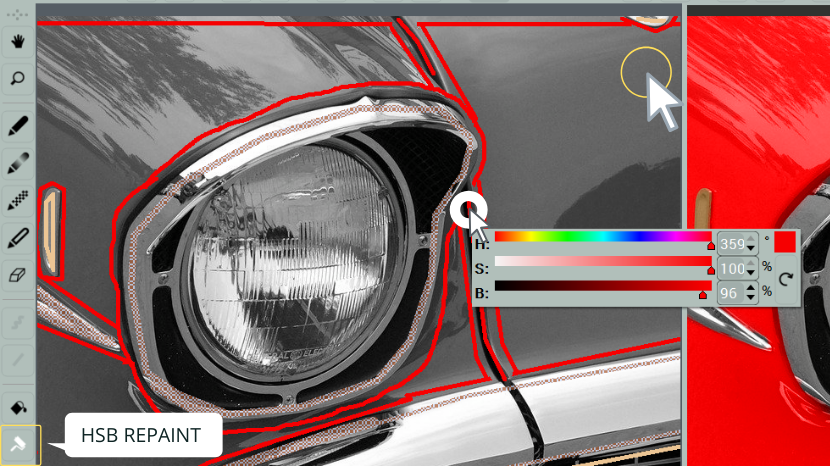
Step 3. Open the color library. Note that this library is available in the Professional edition of CODIJY. If you are using CODIJY Recoloring, pick any color from the Palette or from any of the libraries. 

Step 4. Pick any color. 

Add color masks

The rules of adding masks in CODIJY software:

  1. Draw masks close to the border.
  2. To make CODIJY recognize the boundaries, add colors to both adjoining areas!  Only in this case, CODIJY will fill the color within the area borders, when generating the colorized preview.

Watch the mask drawing process:

You can complete this mask without releasing the mouse button (or raising the pen): 

  • Press Spacebar to cut off the line and change direction.
  • Press and hold Spacebar to switch to Freehand drawing

TIP: The Line masks are generally a better choice to outline the large regular shapes. They are quicker to draw and let you control the distance to the border. Freehand masks are easier to draw over the objects with irregular shape and the small-size areas.

Add colors to the elements

As the next step, add masks for all major areas, excluding the ones, we want to leave in grayscale. Pick a tone of yellow from the Metals: Raw Materials Library for the radiator grill and the side decoration of the car.

Convert the steel parts to monochrome

Select the Decolor Pen . Outline the areawith the  decoloring mask  .

Note: You don’t have to draw masks for each individual element, if they belong to the same color area. Just define the area boundaries and outline them.

In case there are color masks inside the area, outline this zone.

Generate the colorized preview

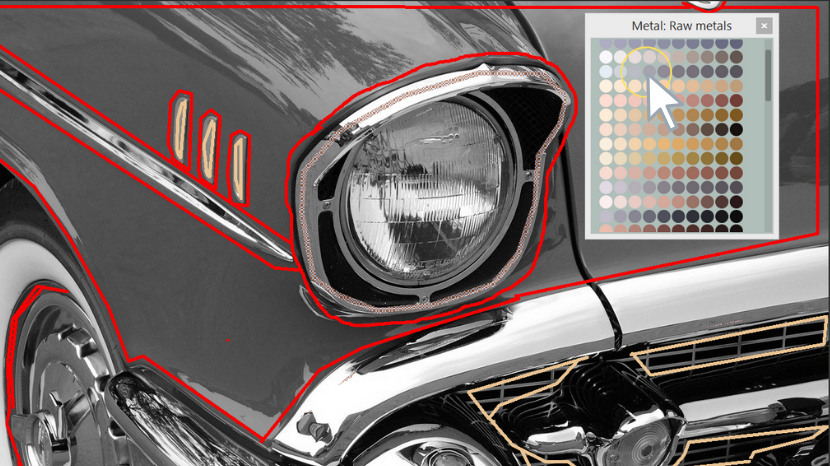
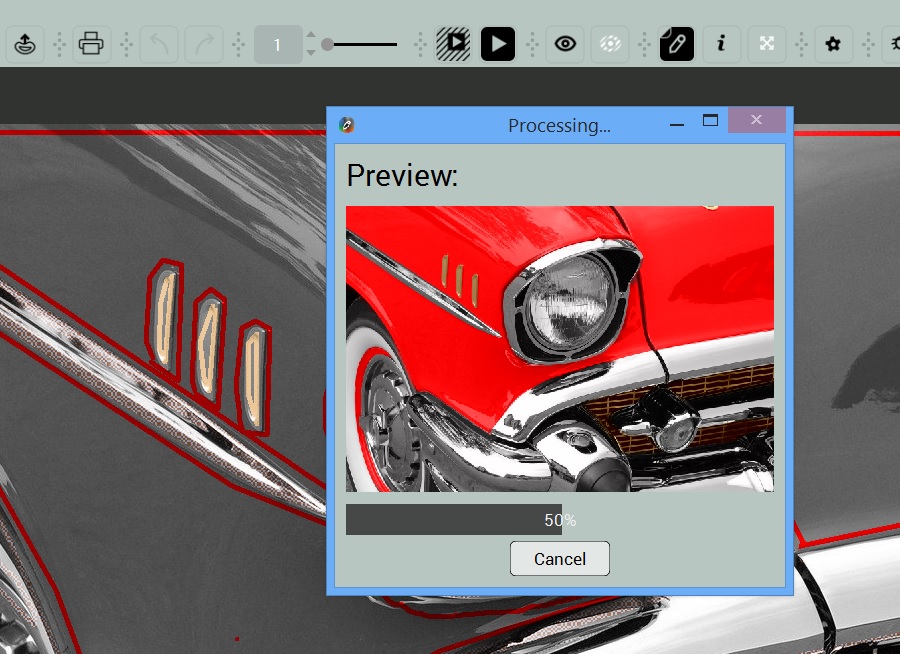
Now it’s time to generate the colorized preview. 

Press Ctrl + R / Cmd + R or click Image Processing on the toolbar

The result is pretty impressive, isn’t it? The reflections look realistic, thanks to the way CODIJY has converted the shades of grayscale into the matching shades of red. 

But, as you might have noticed, the split between the hood and the fender lacks depth due to the lighter tone. 

Edit colors

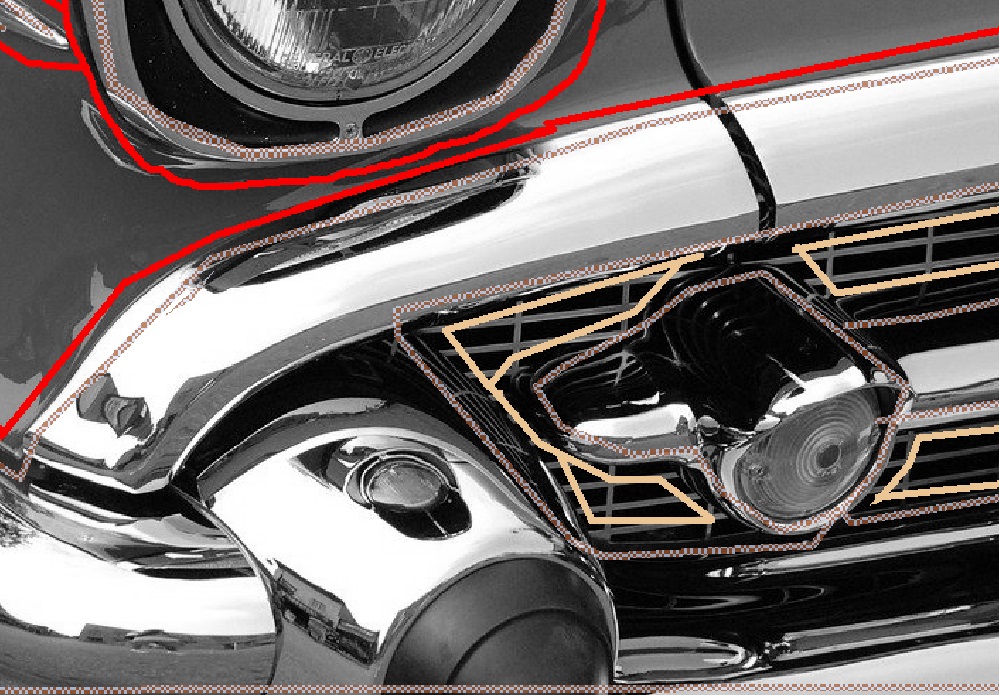
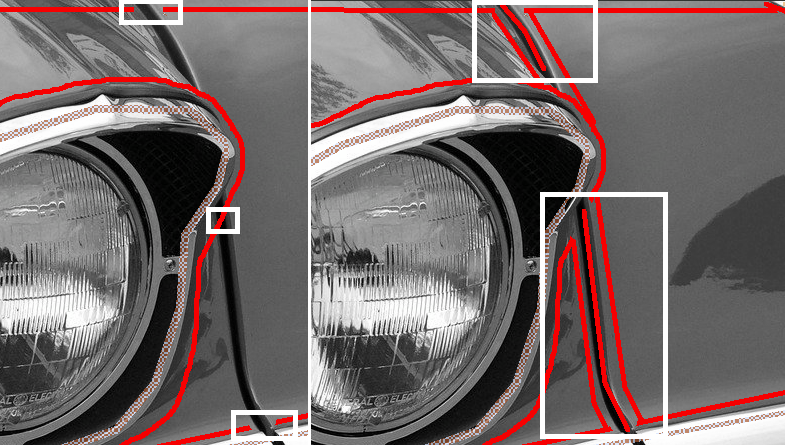
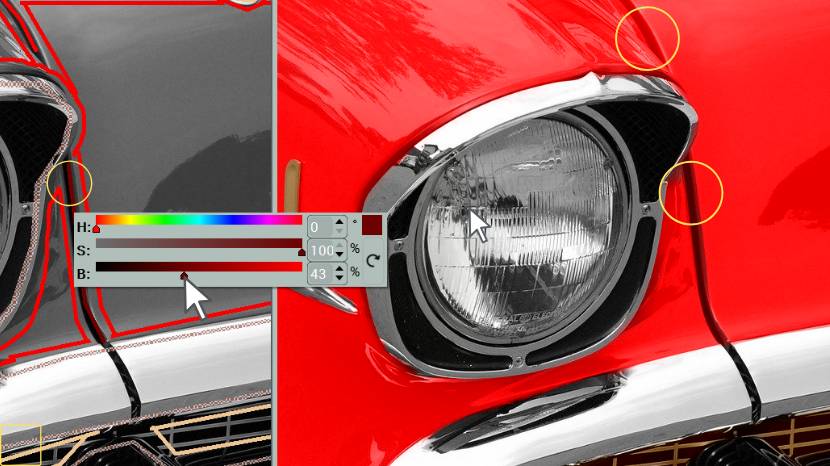
To fix this, we shall add the dark tone over split using the repaint tool.

Step 1. Remove the part of the masks using Eraser 

Step 2. Add the new mask over the split. Be sure to add additional red strokes on the both sides of the split to avoid spreading of the new color across the border.

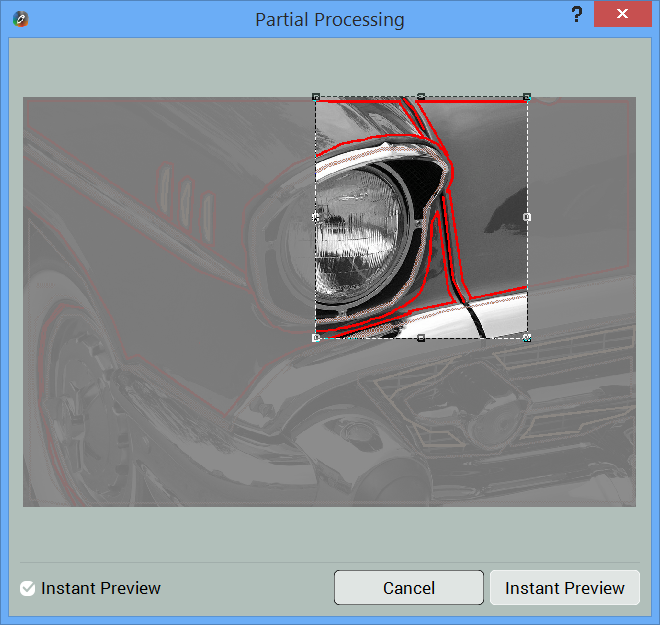
TIP: When you adjust the colors, the best option rarely comes at once. To save time, we recommend enabling the Instant Preview mode (available in CODIJY Colorizer Pro). 

  1. Press Alt+R or click the Partial Image Processing icon 
  2. Select the area
  3. Tick the Instant Preview box
  4. Click the Instant Preview button.

Watch how to enable the Instant Preview in Colorizer Pro:

Step 3. Call the HSB Repaint Dialog:

  1. Press (H) or click HSB Repaint icon on toolbar (see the screenshot)
  2. Click the mask.
  3. The HSB Repaint dialog will pop up. The adjust the parameters of the Hue, Saturation and Brightness. 

Watch how to call and use the HSB Repaint tool:

Step 4. Decrease the brightness of the stroke. Compare the colors of the upper and lower part of the split. The darker tone has added the required visual depth.

Step 5. Set the same Brightness value for the upper stroke. There is no need to generate the preview. It will be ready soon after.

Save your work

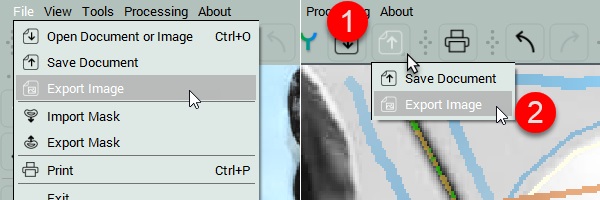
After you’ve finished  editing, make sure to save your work:

  • Press Ctrl +S (Win) / Cmd +S (Mac)
  • Click Save Document icon on the toolbar 

Note: The document saves the masks and the Color History along with the image for anytime reference.

For CODIJY Trial Users: you can open the saved documents in the registered version of CODIJY and generate result without watermarks. 

Export Result Preview to the Image

You can export the color result  to PNG, JPEG, TIFF and other image formats.

Option 1. Go to File -> Export Image

Option 2. Click the Save Document Icon. Hold it for a second to call a drop down menu. It will offer two options: Save Document or Export Image.

Photos for practice

Colorizer Pro

15-day trial

Try the magic art of photo colorization with CODIJY Colorizer Pro! Explore all its features for 15 days absolutely risk-free! Create superb colorizations and save them to CODIJY documents (*mgd files) without limitations. 

Explore all its features for 15 days absolutely risk-free! 

Available for Windows & Mac. Get the download links to your mailbox!   

This is one time email. 

(*) Watermarks will disappear from the colorized preview, after you open saved CODIJY documents in the registered version.