Carmen Miranda: Colorizing a Portrait

Colorizing Face & Smile

In the third part of “Carmen Miranda” colorization class, we’ll apply natural facial tones and complete working on the sequins. 

To prevent the face from looking flat and unnatural we will apply a duo tone technique. As this requires us adding multiple tones within the same contour, we will draw masks in a different way.

About the face coloring technique in CODIJY

We are going to reproduce Carmen’s natural complexion with two shades: a lighter tone for highlights and a richer tone for shadows. After that, we will add masks on the lips, teeth and eyes.

In this part we use use the Complexion: Pale, Lips: Make Up and Eyes: The White Libraries. 

Carmen Miranda: Part 3

7

Add facial tones

Before applying masks lets, let’s set the Partial/Instant Preview mode. 

Partial preview processes only the selected area and thus saves time on generating the result!

Enable partial/instant preview

Partial Preview: Select the preview area in the Partial Processing dialog. 

Click  or press Alt R/⌥R. Resize the selection box accordingly. Run Partial Processing each time you want  to preview the result.
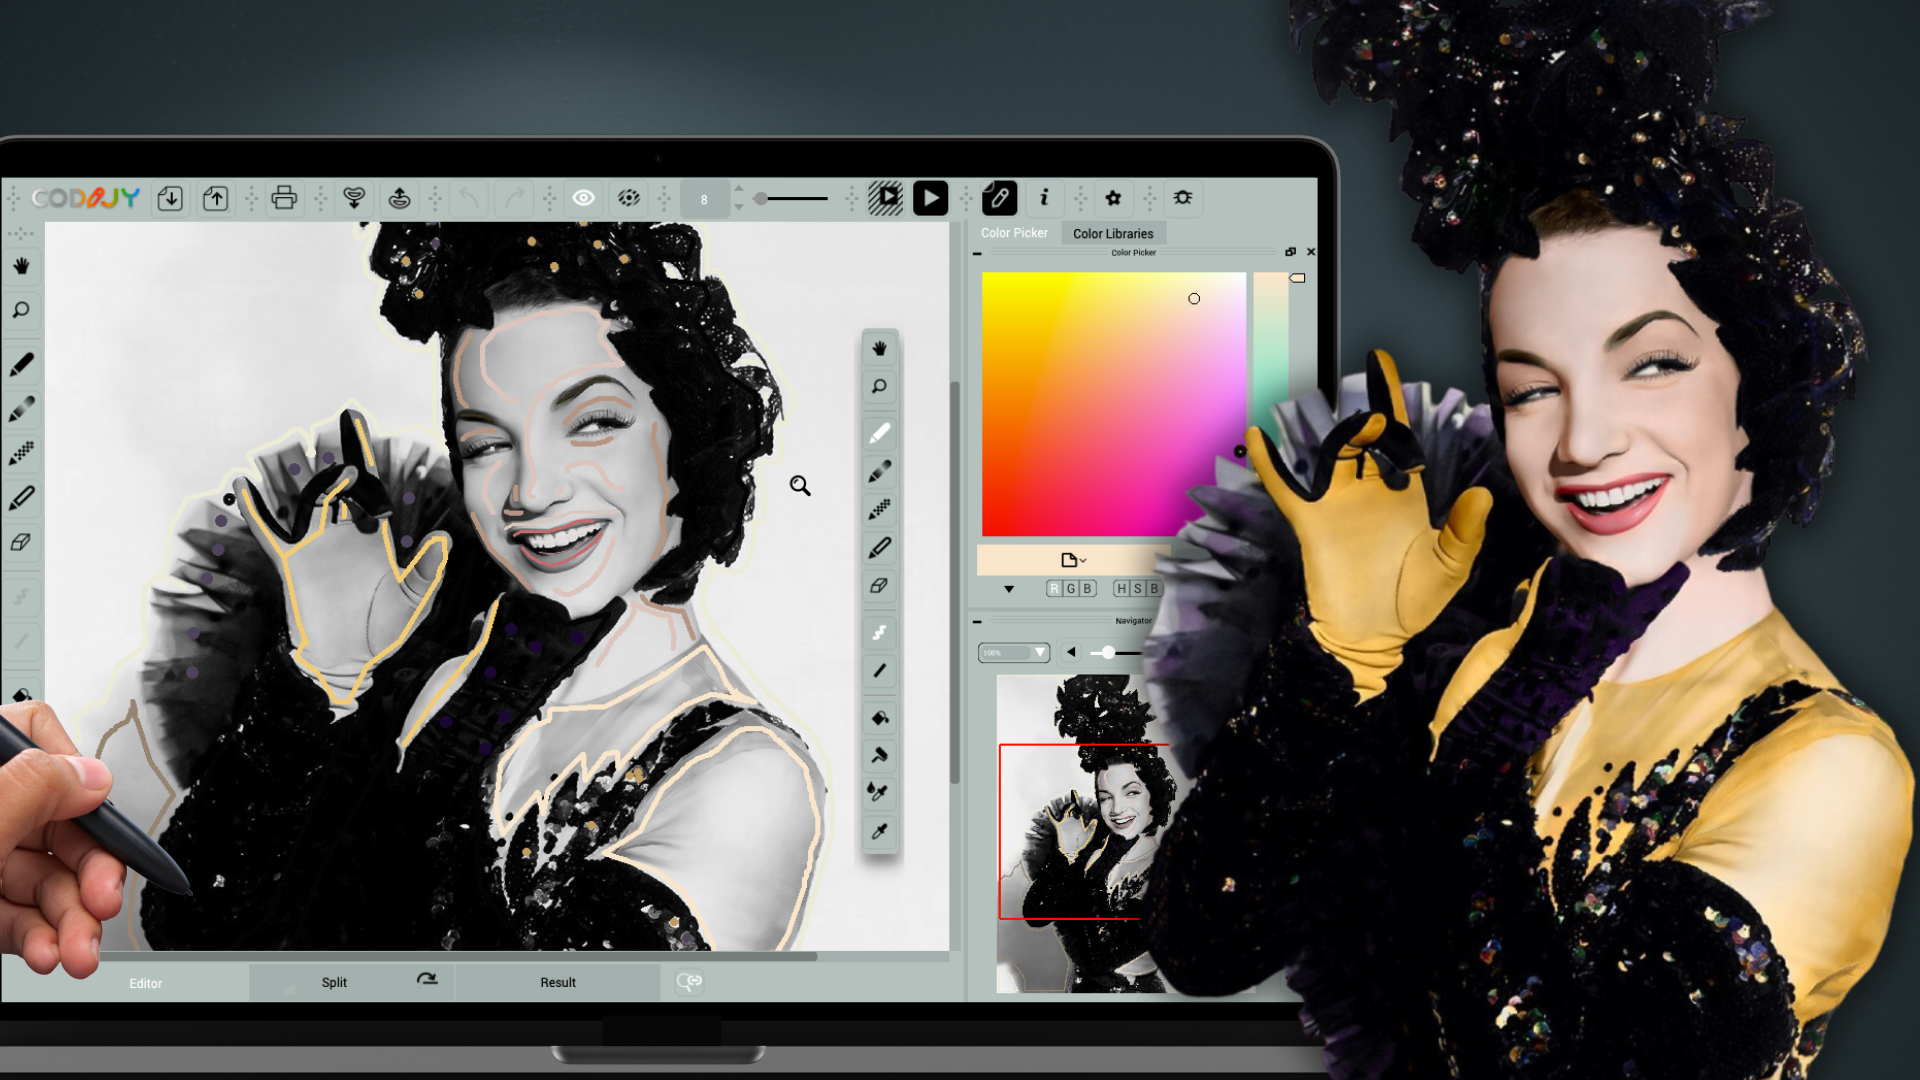
Instant Preview: In CODIJY Colorizer Pro, you can set the partial preview to generate result in real time! For this:

Check the Instant Preview box in the lower left corner and click Instant Preview.

Once the the Instant Preview mode is on, CODIJY will open the color result side by side with the Editor!

Apply the base tone

Now let’s apply the facial tones. Open the Complexion: Pale library. 

To make the Carmen’s face stand out against the yellow backdrop, we pick a saturated powder tone (# eac9c0) for the base and a Mocha tone to enhance the shades.

# eac9c0

# d2ad9d

Enable the Freehand mode  (F) and trace around the highlights starting from the forehead down to the tip of the nose. Then go around the lips, nose and neck.

Now look at the result. The highlights look great, while the shadows on the face appear grayish. 

The low saturation of the light shade is insufficient to add the vibrancy to the dark pixels.   

To remove this effect let’s apply a saturated shade (#d2ad9d) on the cheekbones, around the eyes and on the nose wings.

Note that CODIJY algorithms have created natural transitions between the two tones. Now let’s move on to the smile.

8

Colorize the smile

First, open the Lips: Make up library (Pro) for the lips and pick a coral shade

# f59d9d

# f098d6

Remember that teeth that we perceive as "white" are always light pink or light beige!

In the the Teeth library (Pro), we’ve collected some suitable shades that are recommended to be used instead of pure white. The pink tone will make shiny teeth appear even whiter!

9

Add color to the eyes

As the eyes area is tiny, we may do with just two dots of the beige tone (# d5d0ca) from the Eyes: Eye Whites library. 

10

Finalize the glitter

Once all areas are finished, turn on Instant Preview for the headdress area and add bright dots of blue and yellow to give the sequins a festive shimmer.

Generate full preview and check the result!

11

Save and export the first result

After you generated the final preview, let’s save this color version.  You can export it into any of the supported image formats and save the current color version for future reference under a different name!

Save your work to CODIJY document

Click and hold Save icon and select Save Document or use File -> Save Document.

If you use the trial version, open CODIJY documents after registration to  generate a watermark-free copy of colorization. 

Export result to the image

To export preview as an image, hold down the Save button for a few seconds!

Click and hold Save icon and select Export to Image or use File -> Export to Image.

Now let’s create an alternative colors version using CODIJY repainting tools!